
Running your own server at home costs less than most people expect. You might already have an old desktop or laptop that can run the services you want, so check what you have before buying anything. If you do need a machine, a budget of around $150 to $300 gives you a starting point for comparing basic mini PCs, with used hardware worth checking too.
I'm going to walk through the hardware, the operating system, and some useful services to run. Think about those together: a media library needs storage, a few virtual machines need RAM, and a network ad blocker can run on very little. Pick one to three things you actually want to use, then match the machine to those jobs.
Match the hardware to what you want to run
An old desktop with room for several hard drives can make a good NAS. A Raspberry Pi or mini PC with 32 or 64 GB of storage can handle lightweight services, but a growing media library will need more space. And while 8 GB of RAM goes a long way for a few containers, several virtual machines can quickly use that up, depending on what runs inside them.
There are three practical ways to get started.
A new low-power mini PC. An Intel N100 or N150 is a good starting point for a few home services. Compare the included RAM and SSD, whether you can upgrade them, and how you would connect extra storage. The processor's power rating is only part of the picture; the whole machine uses more power once you include drives and other components.
My current favorite is the ZimaBoard 2: Intel N150, 8 GB of RAM with 32 GB of eMMC, or 16 GB with 64 GB, plus 2 SATA ports, 2 x 2.5 GbE, and a PCIe expansion slot. The RAM is soldered, so I would get the 16 GB model if VMs are part of the plan. Do note that the official store now lists the 8 GB board at $339 before shipping, so compare current prices with conventional mini PCs before buying.
A used business mini PC. Search Facebook Marketplace or eBay for a Lenovo ThinkCentre M720q or M920q, an HP EliteDesk 800 G4 or G5 Mini, or a Dell OptiPlex 7070 Micro. These are worth checking for an inexpensive machine with an 8th or 9th generation Core i5, replaceable RAM, and an SSD. Check the exact listing for memory slots, storage connections, and included drive brackets or cables. If hardware transcoding is your main reason for buying one, read the Quick Sync notes below before choosing an older CPU.
An old desktop tower. If you already have one, start there. The extra drive bays and expansion slots give you room to add storage or a GPU, and I use an old gaming PC as a local AI server. Before buying drives, check the motherboard's SATA ports, the case's drive mounts, and the available power connectors. Adding drives gives you capacity; protecting that data takes a storage layout and backups too.
The three levers: storage, RAM, CPU
Storage decides what you can keep
A 32 or 64 GB eMMC drive can get you started with a small Linux install and a few lightweight services. How far it goes depends on the OS, container images, databases, and logs. Leave free space for updates and growing application data, especially if you run Home Assistant history or monitoring tools.
If you have the option, I do recommend an SSD for the OS and applications, preferably NVMe when the machine supports it. A 256 or 512 GB SSD gives you more breathing room, while a larger SSD can hold both the system and your first batch of files. A SATA SSD you already own is a perfectly reasonable place to start too.
For a growing media library, photo backups, or family file storage, plan for separate data drives. For example, two 4 TB hard drives configured as a mirror give you about 4 TB of usable capacity before filesystem overhead and allow the system to survive one drive failing. You can add more capacity later, but check how your chosen OS and storage layout handle expansion before buying the next disk.
A mirror or parity array helps with drive failures. You still need a separate backup for accidental deletion, theft, or losing the whole machine. Keep another copy of important files, ideally with one copy outside the house, and check that you can restore it.
RAM decides how many things run at once
Docker and LXC containers share the host kernel, which keeps their overhead low. The application inside still decides how much memory it needs: a small DNS service and a photo server doing machine learning are very different workloads. Counting containers alone will not tell you how much RAM to buy.
Virtual machines run their own guest OS, so budget memory for each guest and leave room for the host. A small Linux server VM might start with 1 to 2 GB, while I would budget 4 to 8 GB for a basic Windows VM and more for demanding applications. Hypervisors can manage memory dynamically, but you still need enough for the workloads you run together.
These are planning ranges, so check the requirements of the services you choose:
- A few lightweight Docker or LXC services: 8 GB goes a long way.
- Proxmox with 2 or 3 modest VMs plus containers: I would start with 16 GB, with 32 GB giving you more room.
- A larger mix of media, photo processing, and other services: consider 32 to 64 GB with room to upgrade.
Check whether the RAM is soldered before you buy. Many used business minis have replaceable SODIMM modules, while newer mini PCs vary. The ZimaBoard 2 has no RAM slots, so you cannot upgrade its memory later.
CPU decides what kind of work you can do
An N100 or N150 is a good fit for a few of the lightweight services covered below. For a media server, I particularly like Quick Sync, Intel's hardware video encoder and decoder. When your media server is configured to use it with supported formats, it can take much of the transcoding work off the CPU.
There is no fixed stream count to promise here. Resolution, codecs, HDR tone mapping, subtitles, and the client device all affect the workload. If the client can play the original file directly, video transcoding is not needed at all. AMD and NVIDIA also offer hardware acceleration, so check your existing GPU before replacing a working machine.
The N100 and N150 include Quick Sync, but check the exact processor and its supported codecs when shopping. Intel Core models ending in F or KF do not have integrated graphics. Jellyfin's hardware guide also flags declining Linux QSV support for older Intel generations as Intel retires their media toolkit. An existing 7th to 10th generation Intel machine with integrated graphics can still be useful, but I would compare newer options if buying specifically for a media server.
If the plan involves several VMs or a game server, compare the exact CPU models as well as the RAM. More cores can help with several busy workloads, while some game servers benefit more from strong performance on a single core.
Scaling out instead of up
Once you are comfortable with one server, a few mini PCs can become a cluster for learning Proxmox or Kubernetes. Similar hardware makes that easier to manage, but it is something you can add later.
For Proxmox high availability, plan for 3 nodes, or research a 2-node setup with a separate QDevice to provide another vote. Clustering alone does not make services survive an outage: you also need suitable storage, spare capacity, and HA configuration. Planned VM migration can help with maintenance; recovering from a failed node usually involves restarting its guests on another node. The Proxmox HA documentation covers those requirements.
Sizing a light or heavy home server
Most people fall into one of two camps, and it helps to know which one you are in before spending money.
Light. A few services such as Home Assistant, DNS filtering, network monitoring, a password manager, and remote access. A machine with 8 GB of RAM and an SSD is a sensible starting point. Check what you already own, then compare used and new options if you need to buy. Actual memory and disk use depend on the applications, their settings, and how much history you keep.
Heavy. Terabytes of media that several family members stream at once, photo backup for every phone in the house, and dozens of services doing work in the background. This is where I am. I would look at 32 to 64 GB of RAM and expandable storage for that kind of setup, but the services and data volume decide the budget. Price the data drives and a backup destination along with the server itself.
You can grow into that over time. My storage box is an Unraid server holding the media library and most of my 40 to 50 services. Next to it sits a mini PC running Proxmox that handles the infrastructure I cannot afford to lose: the reverse proxy everything routes through, a Technitium DNS server, one Windows VM for the 3 or 4 times a year I need one, and a couple of throwaway test VMs. When the Unraid box goes down for a drive swap, DNS and the proxy keep running. That is one way to expand once you know which services you rely on every day.
The OS layer: what goes on the metal
Now look at what you want to install on the hardware. These are 5 options I would consider, depending on whether your main goal is running containers, experimenting with VMs, or managing storage.
Bare metal Linux with Docker
Install Debian or Ubuntu Server, install Docker and Docker Compose, and put each service in a container. This is the most flexible option and the one that teaches you the most. You can stay in the CLI, or layer tools on after the fact: Portainer or Dockge for a web UI over your containers, and Cockpit for host management (updates, storage, logs, and KVM virtual machines through the cockpit-machines plugin).
Trade-off: there is no snapshot of the whole system unless you set up ZFS or btrfs yourself, and every host-level problem is yours to fix. Fits a mini PC with 8 GB and anyone who wants to understand what is happening underneath.
Proxmox VE
A Debian-based hypervisor with a web UI on port 8006. It runs full virtual machines (KVM) and LXC containers side by side, takes snapshots, runs scheduled backups (and pairs with Proxmox Backup Server for deduplicated offsite copies), and clusters across nodes. It is the right pick if you want a Windows VM, isolated test environments, Home Assistant OS as a proper VM with add-ons, or the option to cluster later.
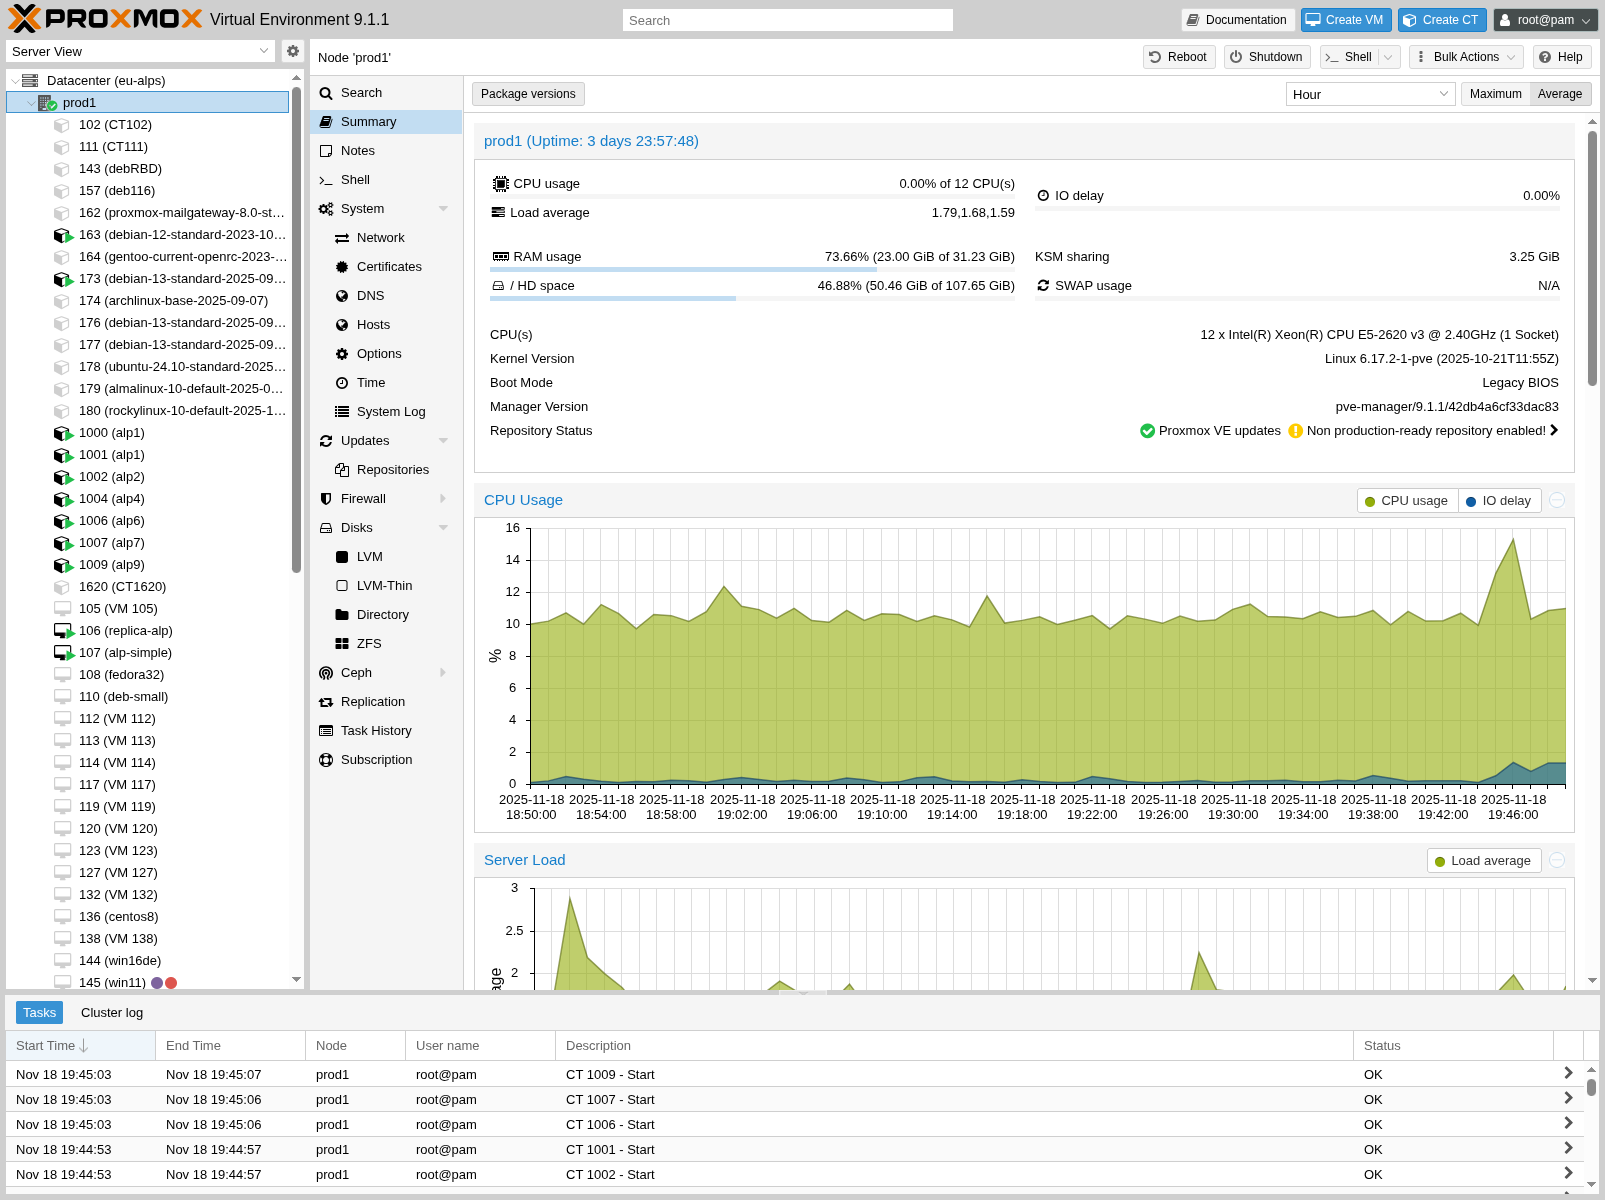
Proxmox keeps your VMs, containers, and host resources in one place. Screenshot: Proxmox documentation.
Trade-off: RAM and a little more to learn. For a few VMs, I would budget 16 to 32 GB; that is a workload recommendation, not Proxmox's installation minimum. Proxmox's official guidance is to run Docker inside a VM rather than on the host. Plenty of people run it in an LXC to save memory, with extra configuration and the occasional upgrade headache. The interface can feel overwhelming at first, but you do not need to use every feature to get started.
TrueNAS
Storage first, everything else second. TrueNAS Community Edition runs ZFS, which gives you checksummed data, snapshots, and replication, and shares it out over SMB and NFS. It also supports virtual machines and Docker-based apps. Plan for a dedicated boot drive separate from the data pool, at least 2 data drives if you want a mirror, and enough RAM for both storage and the apps you add.
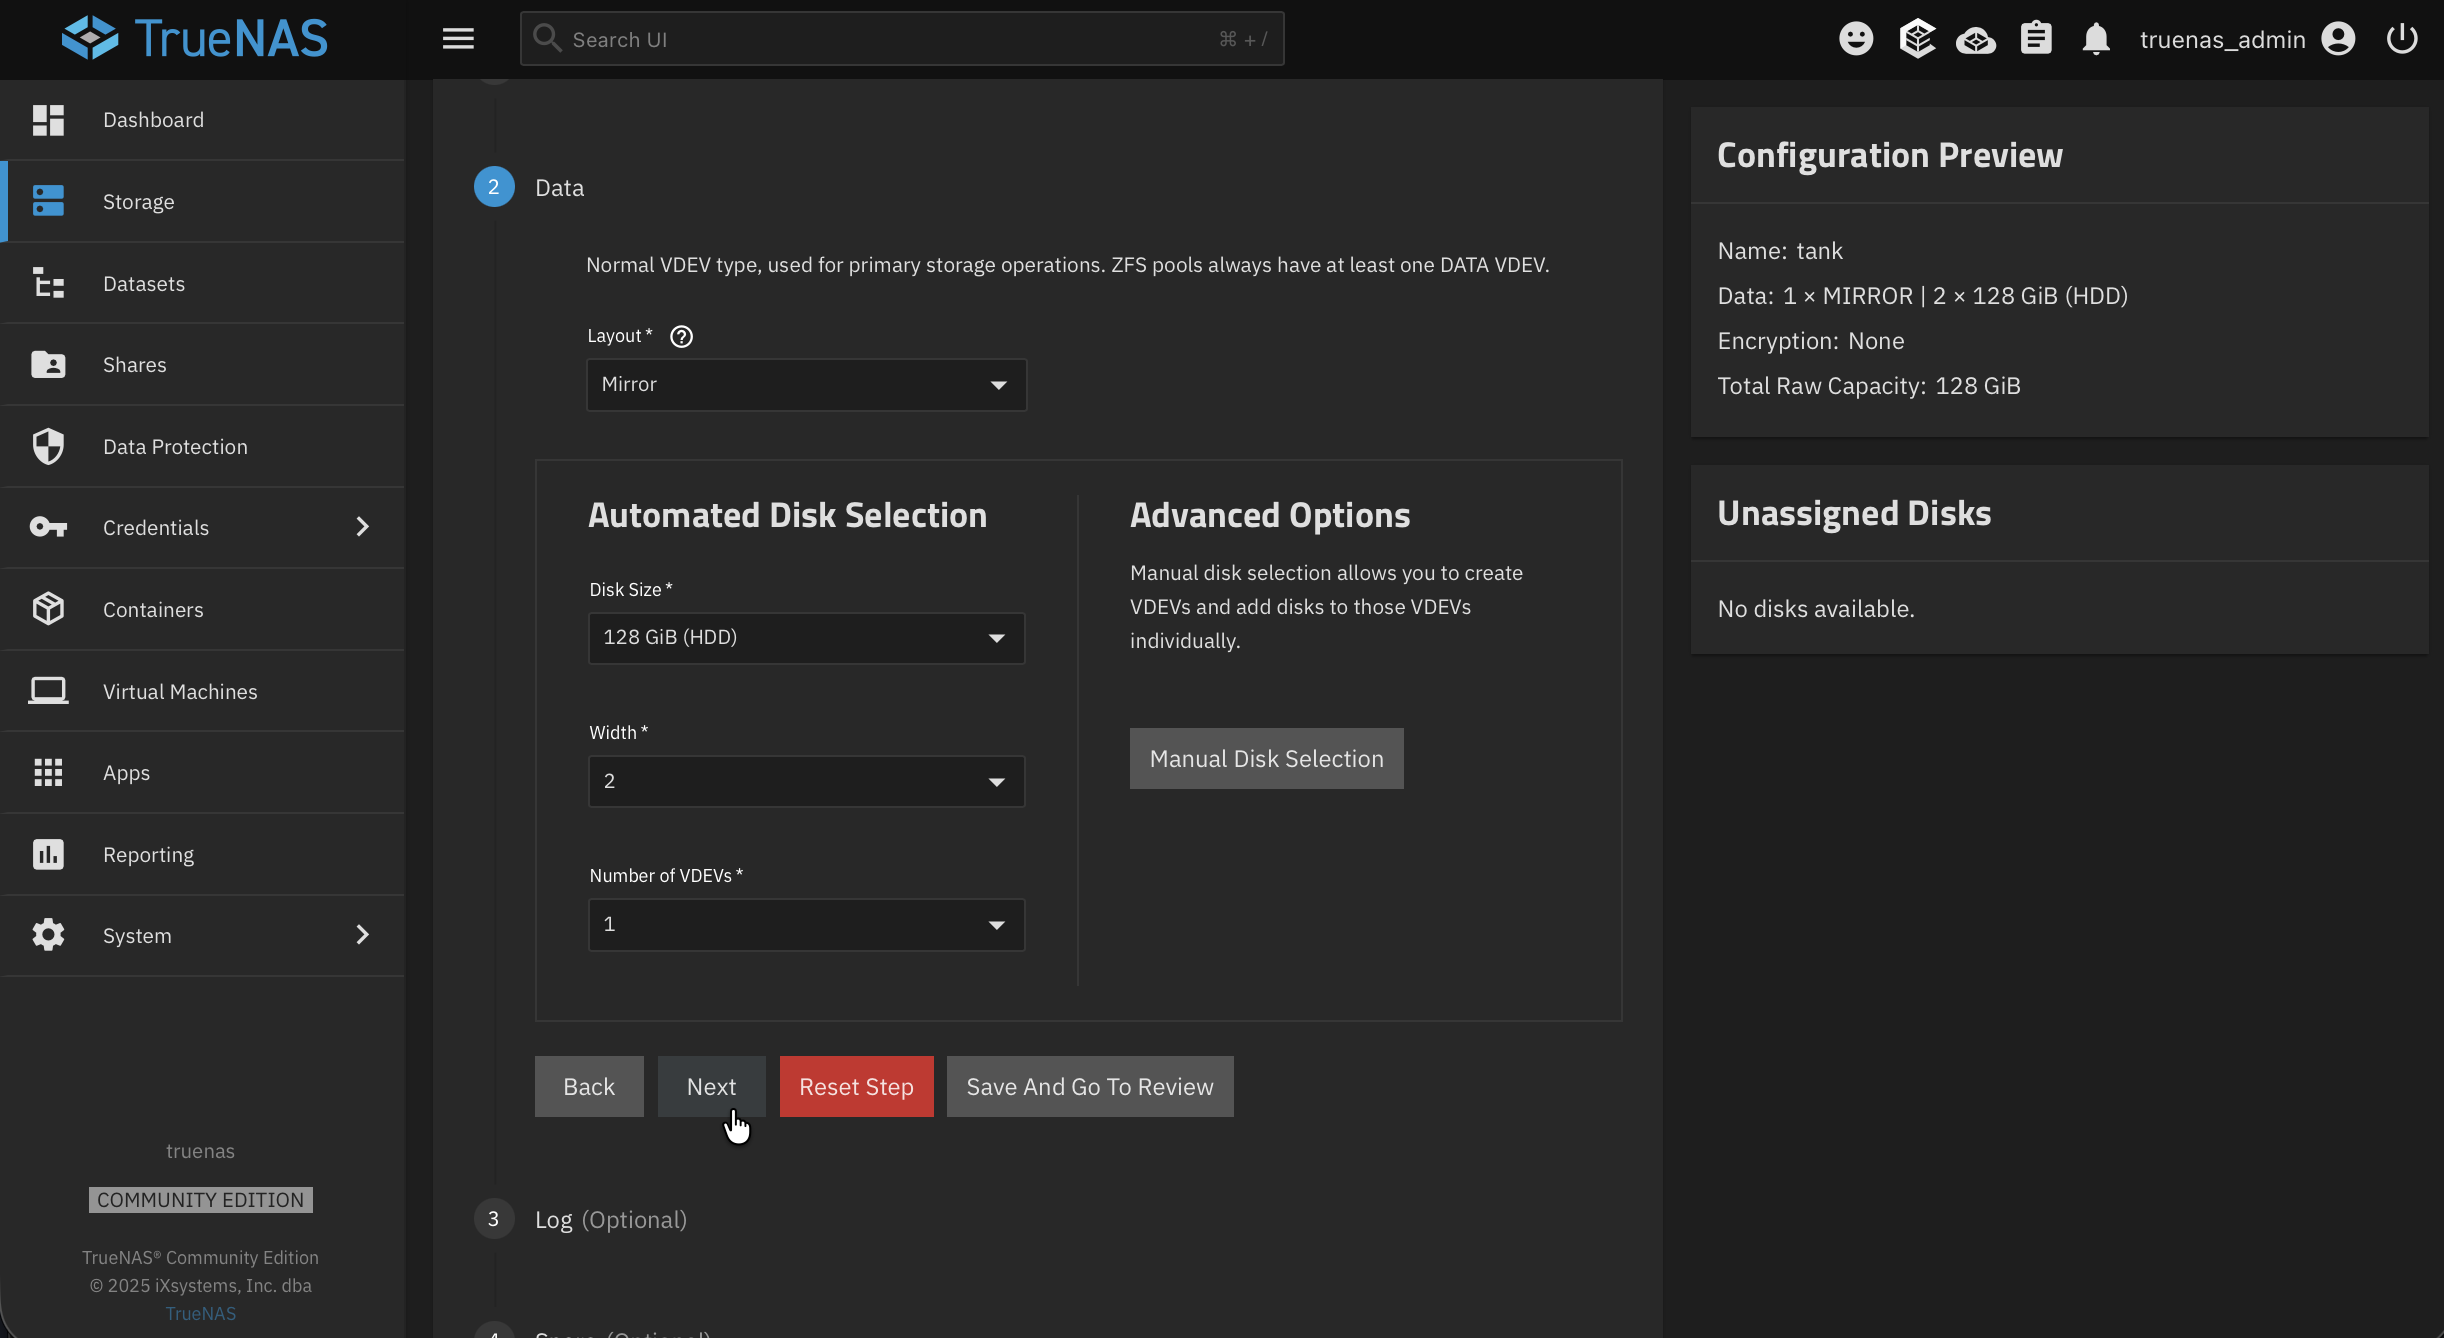
Setting up a mirrored storage pool in TrueNAS. The preview shows how the selected disks will be arranged.
I like its storage management, but I have not found the Docker experience to be my favorite. When I have used TrueNAS, I have tended to put other workloads in VMs, which adds to the RAM I need. It makes the most sense to me when managing files and disks is the server's main job.
Unraid
The other storage-first answer, and the one I run. Unraid's array accepts drives of mismatched sizes with 1 or 2 parity drives, so you can add one data drive at a time as you can afford it. Each parity drive must be at least as large as the largest data drive, and parity drives do not add usable file storage. That makes it pretty convenient if you already have a mix of drive sizes.
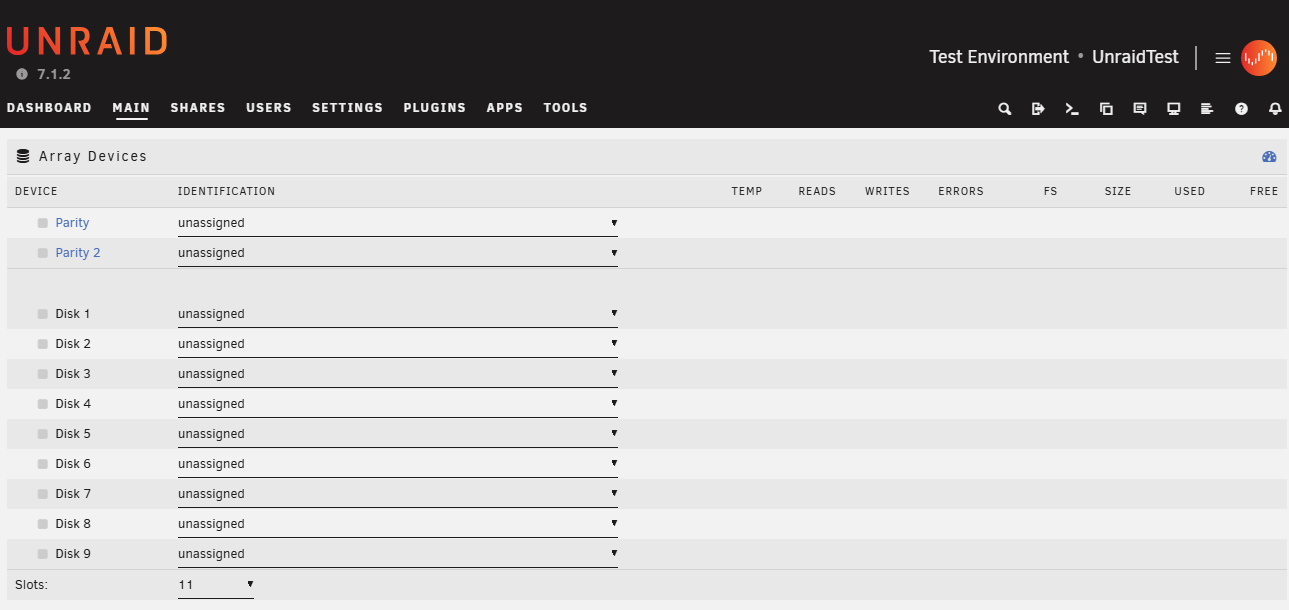
Unraid gives parity drives and data disks separate slots when you configure the array. Screenshot: Unraid documentation.
Docker and VMs are built in, the community app catalog is large, and it boots from a USB stick so every drive bay stays available for data. ZFS pools are supported too. I personally prefer Unraid for my media server, even though I do not think its Docker management is perfect either.
Trade-off: Unraid requires a paid license, so include that in your budget. Its parity array suits gradual expansion, while write performance depends on your drives and whether you use an SSD pool for incoming data and apps.
CasaOS (or ZimaOS)
CasaOS is an application layer you install on a supported Linux distribution, with an app store dashboard for managing Docker services. ZimaOS is a separate operating system from the same company and ships on the ZimaBoard 2. I like the ZimaOS interface, especially how approachable it makes setting up shares and apps.
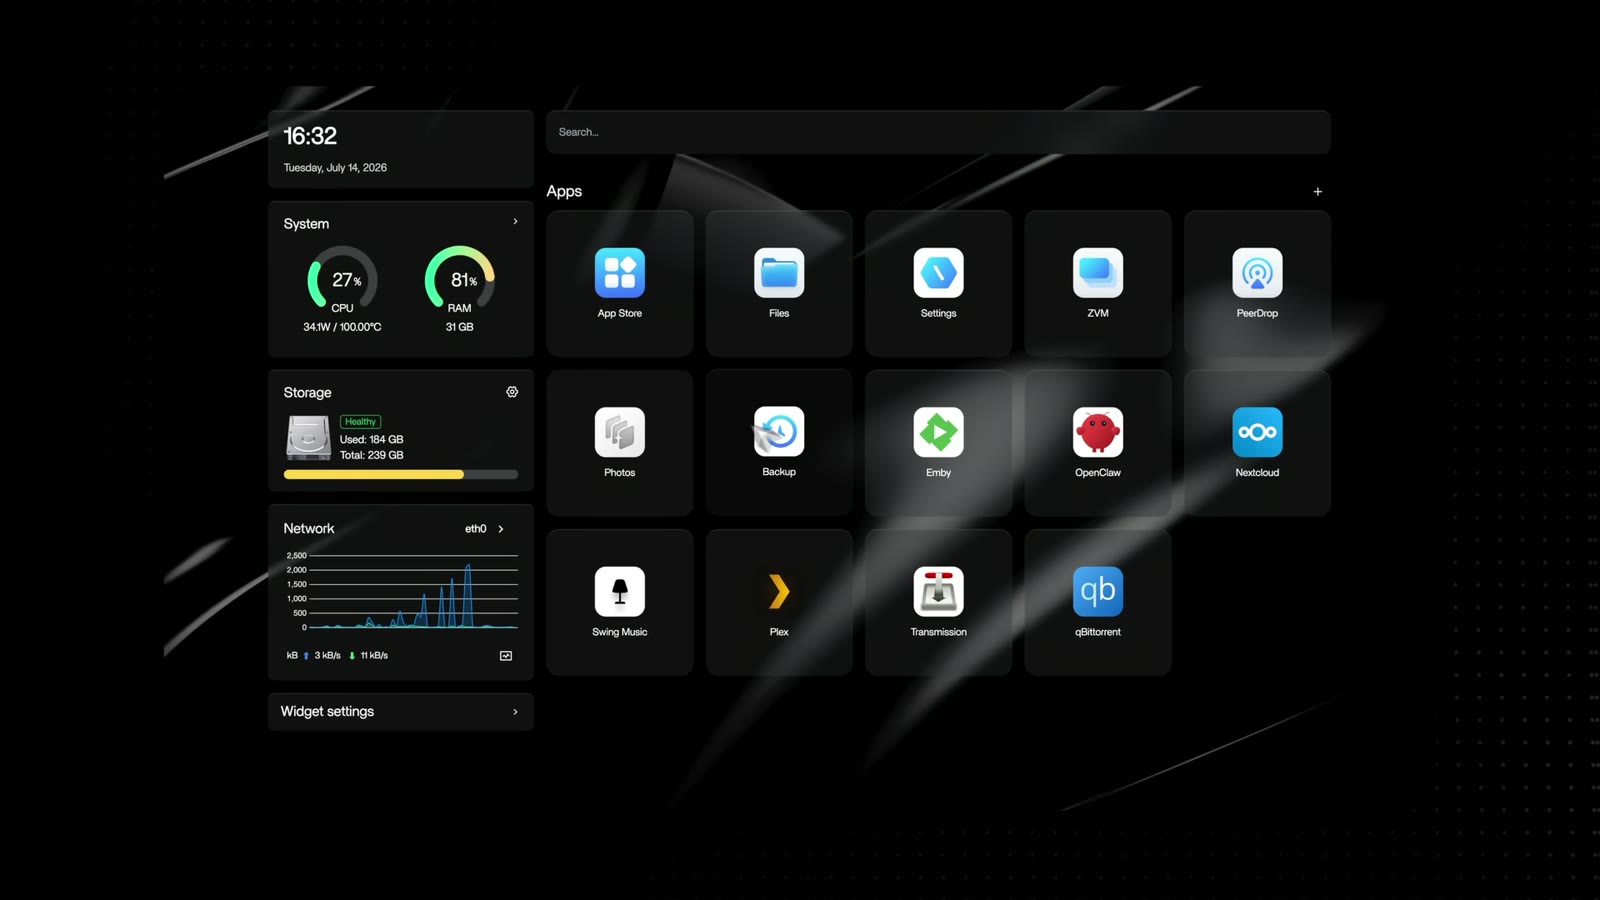
The ZimaOS dashboard puts your apps alongside a quick view of the server's resources. Screenshot: ZimaOS.
I would treat ZimaOS as something worth trying and keeping an eye on while you compare the other options. See whether the apps and storage features you need fit the way it works before choosing it for your main server. If you move to another platform later, plan to transfer your application data and configuration as well.
Matching hardware to OS
| Your hardware | Your goal | Pick |
|---|---|---|
| Existing PC or mini PC, around 8 GB, SSD | A few useful services | Bare metal Debian + Docker; consider CasaOS for an app dashboard |
| Mini PC, 16 to 32 GB | Learn, isolate workloads, run a Windows VM, cluster later | Proxmox VE |
| Desktop tower with room for data drives | Store files first, run apps second | TrueNAS or Unraid, with a separate backup plan |
| Spare compatible machine | Try an approachable storage and app interface | Evaluate ZimaOS |
| Several mini PCs, added later | Learn clustering and availability | Proxmox cluster or k3s |
What to run, by tier
You do not need to install everything here. Pick one to three services you will use every day, such as DNS filtering, a media server, or photo backup. Get them working, learn how to update and back them up, and get comfortable maintaining them before adding the next thing. Trying to set up everything at once makes it much harder to understand what broke or why.
Light tier (any hardware above)
- DNS filtering: Pi-hole, AdGuard Home, or Technitium DNS. Network-wide ad and tracker blocking, plus local names for everything else on this list.
- Home Assistant: the home automation hub. Run it as a container on a Docker host, or as Home Assistant OS in a Proxmox VM if you want add-ons.
- Uptime Kuma: monitoring and alerts for every service and device.
- Reverse proxy: NetBird Reverse Proxy. HTTPS addresses for your web apps, automatic TLS certificates, and optional SSO, password, or PIN protection, managed from the NetBird dashboard.
- Vaultwarden: a self-hosted Bitwarden-compatible password manager.
- Remote access: NetBird, covered in the next section.
These are candidates for a small server, but their combined resource use depends on which you pick and how you configure them. Keep an eye on memory and disk usage as you add services. With NetBird Cloud hosting the proxy, there is no separate reverse proxy container to run on your mini PC.
Heavy tier (drives required)
- Jellyfin or Plex: the media server. Quick Sync can reduce CPU load when video needs transcoding; direct playback and the formats you use determine how much hardware you need.
- Immich: photo and video backup for every phone in the house, and a Google Photos replacement.
- Nextcloud: files, calendar, contacts, and document sync.
- Paperless-ngx: scan, OCR, and search every document you own.
- Backups: Proxmox Backup Server if you are on Proxmox; restic, Kopia, or Borg otherwise. A second copy in a second location is not optional once the family's photos live here.
Reaching all of this from outside the house
Everything above is useful on your LAN. It becomes indispensable when it is reachable from your phone on cellular or your laptop in a hotel, and this is the point where most homelab guides hand you a port forwarding tutorial and a dynamic DNS service. Do not do that. Forwarding ports exposes every one of those services to the whole internet, and it does not work at all if your ISP puts you behind CGNAT, which is the default on most cellular, 5G home internet, Starlink, and a growing share of fiber connections.
NetBird solves this with an overlay network. Install the agent on your server and on your devices, and they connect to each other over encrypted WireGuard tunnels, peer to peer, punching through NAT on both sides, with a relay as fallback for the connections that cannot be made directly. No open ports, no static IP, no dynamic DNS.
Start by signing in to the NetBird dashboard. For a server, create a one-off setup key under Settings → Setup Keys, then use it to register the machine. This lets you connect a server without needing an interactive browser login on it.
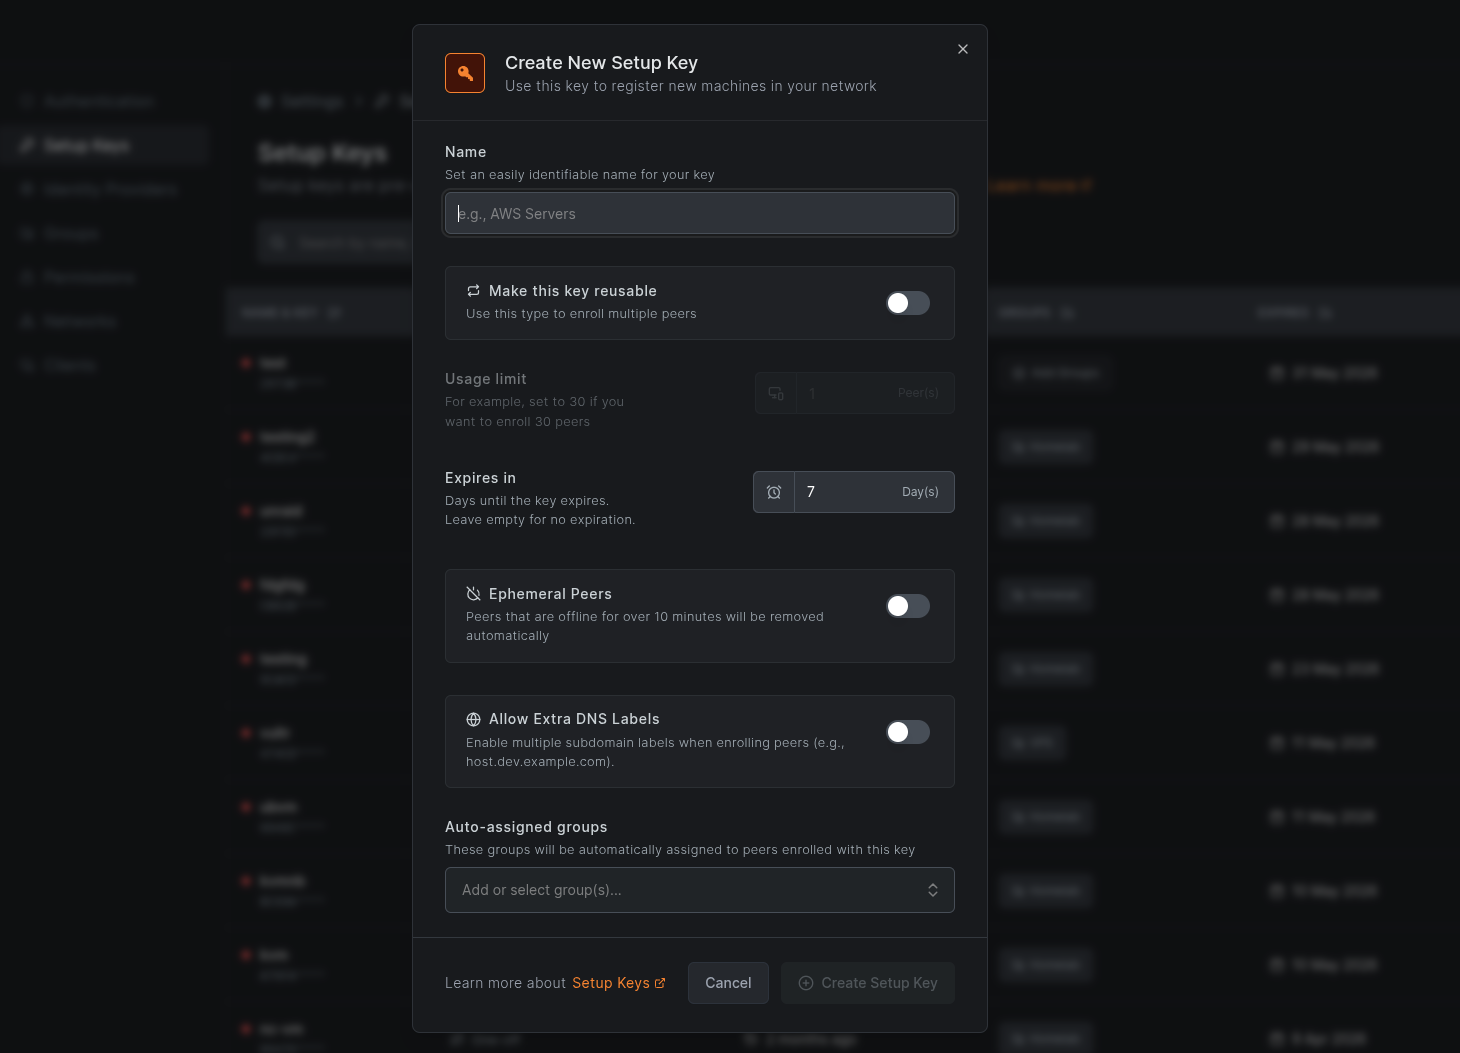
Give the setup key a name you recognize and leave the reusable option off for a single server.
Choose the installation method for your platform:
| Platform | How to install NetBird |
|---|---|
| Debian, Ubuntu, or another supported Linux host | Use the Linux installation instructions, then register with your setup key. |
| Proxmox VE | Install on the host for access to the hypervisor itself, or follow the LXC guide for a separate routing peer. The LXC setup includes passing through . |
| Unraid | Install the native NetBird plugin through Plugins → Install Plugin. Open Settings → Netbird, enter your setup key, and enable NetBird. |
| TrueNAS | Install NetBird from the TrueNAS Apps catalog, enter your setup key, and enable Host Network so it can reach your LAN. |
| Docker host | Follow the Docker installation guide for the container's network permissions, persistent state, and setup key. |
For example, on a Debian or Ubuntu server with installed, run the Linux installer and register the peer:
Replace with the key you created. If you are already in a root shell, omit . Confirm the server appears connected under Peers in the dashboard.
The TrueNAS app uses userspace networking by default, so its NetBird IP does not give you direct access to the NAS host. To reach the TrueNAS web UI or shares, create a Network, select the TrueNAS peer as its routing peer, and add the NAS's LAN IP as a resource, for example . Add an access policy allowing your device group to reach that resource. You can use your actual home subnet instead if you want to reach more devices; the linked TrueNAS guide walks through this.
Now install the NetBird client on your laptop or phone, sign in to the same account, and connect. With the server and your device online, you can build out access as needed:
- Route the whole LAN. Configure the server as a routing peer for your home subnet (192.168.1.0/24, for example). Now devices that cannot run an agent, like the printer, the smart home hub, or the NAS management page, are reachable too.
- Give people only what they need. Access policies work on groups. Put the family's phones in a group that can reach Jellyfin and Immich, and keep the Proxmox web UI and SSH in a group that only your own devices are in.
- Keep your local DNS names working remotely. Point NetBird's DNS settings at the Pi-hole or Technitium server from the light tier, and jellyfin.home resolves the same way from a hotel as it does from your couch.
HTTPS access with NetBird Reverse Proxy
For web apps you want to share, NetBird Reverse Proxy gives you a public HTTPS address that people can open in a browser without installing the NetBird client. In the dashboard, add a service, choose a domain, point it at your application's peer and port, and enable SSO, a password, or a PIN. NetBird handles the TLS certificate and forwards requests through an encrypted tunnel to your server. With the hosted proxy, your home router needs no port forwarding.
For private dashboards, use NetBird-Only access. The HTTPS address is reachable only from connected NetBird devices in the groups you allow. This requires a proxy cluster with the Private capability, such as your own NetBird proxy configured for private services. The linked guide covers that setup.
NetBird Cloud's free plan covers a typical home network, and the whole management plane can be self-hosted if you would rather keep it in house. Setup docs are at docs.netbird.io.
Where to start
Start with the hardware you already have, or buy one machine that fits the first few things you want to run. Pick an OS that suits those jobs: bare metal Linux for containers, Proxmox for experimenting with VMs, or TrueNAS or Unraid when storage is the main focus.
Then get one to three services working and use them every day. Learn their settings, updates, and backups, and connect your server and personal devices with NetBird for remote access. Once you are comfortable maintaining that small setup, add more storage, more services, or another machine as you need it. The Docker getting started guide and Proxmox walkthrough are good next steps when you are ready to install something.