
A remote KVM-over-IP is one of those tools that you don't think about until you need it, and then you really need it. SSH stopped responding, the BIOS is asking a question and nobody's there to answer it. With a KVM plugged in, you get keyboard, video, and mouse access to the machine as if you were sitting in front of it.
The catch has always been: a KVM is a privileged path into a machine, and the default way to make one reachable from outside your network is to forward a port on your router. That's not a bet I'd want to take on a $30 capture-card-and-Raspberry-Pi build, and I wouldn't take it on a polished commercial appliance either.
This is where the GL.iNet Comet Pro (GL-RM10) plus its new native NetBird integration in firmware 1.9 is useful: the KVM joins your encrypted overlay network directly, so it's only reachable from the peers you've allowed, with no exposed ports anywhere.
The Comet Pro Itself
Quick tour of the hardware before we get to the NetBird part, because the device is doing a few nice things.
On the front, there's a small touchscreen that shows the local IP you connect to, which networks the device is on, and which peripherals are connected. Swipe one way and you get a real-time preview of what the target machine is currently displaying. Swipe the other way and you have quick settings for the display, Wi-Fi, GL.iNet cloud service, and your VPN options (NetBird lives here).
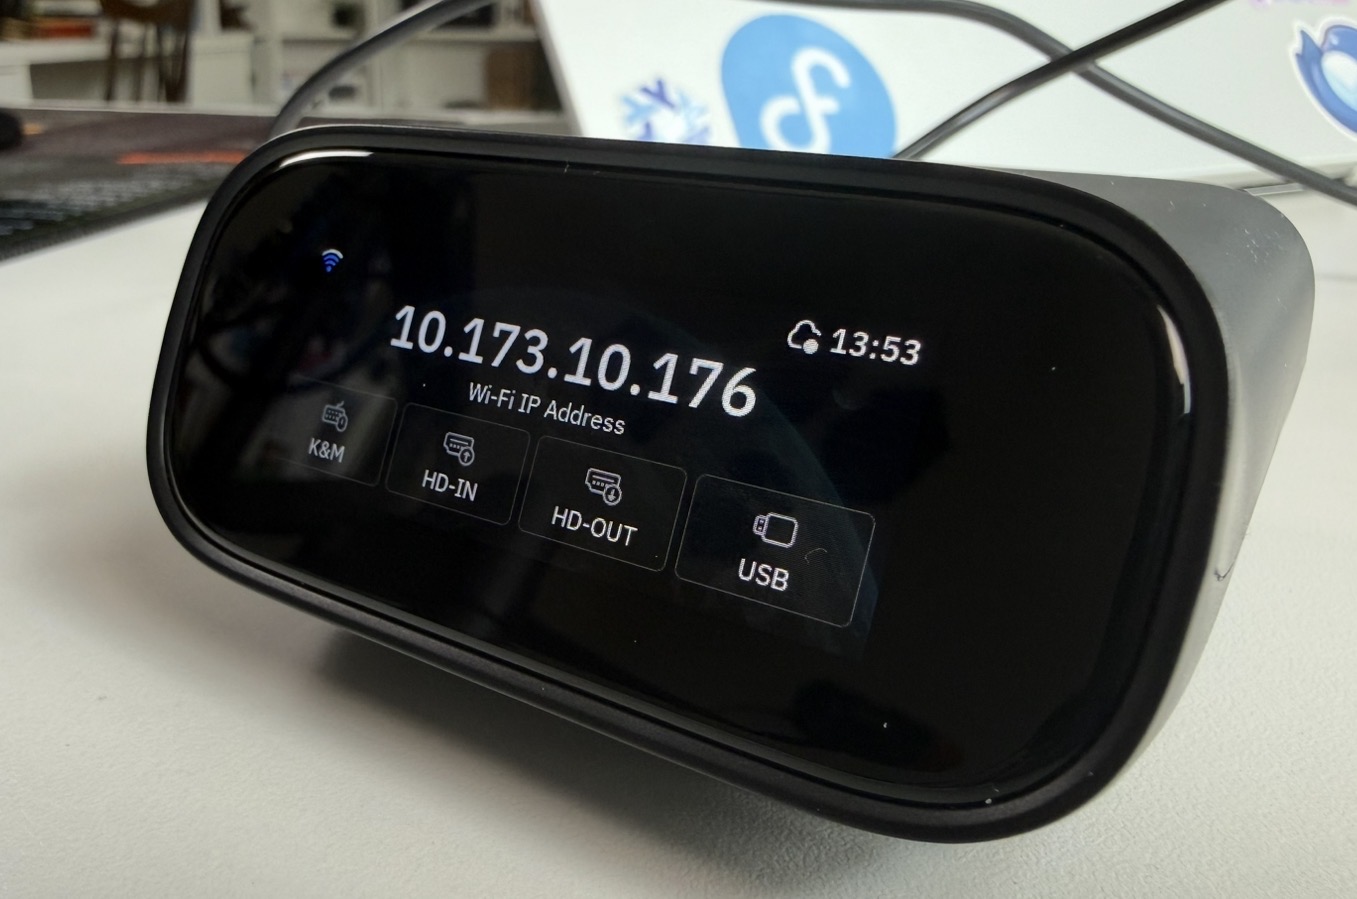
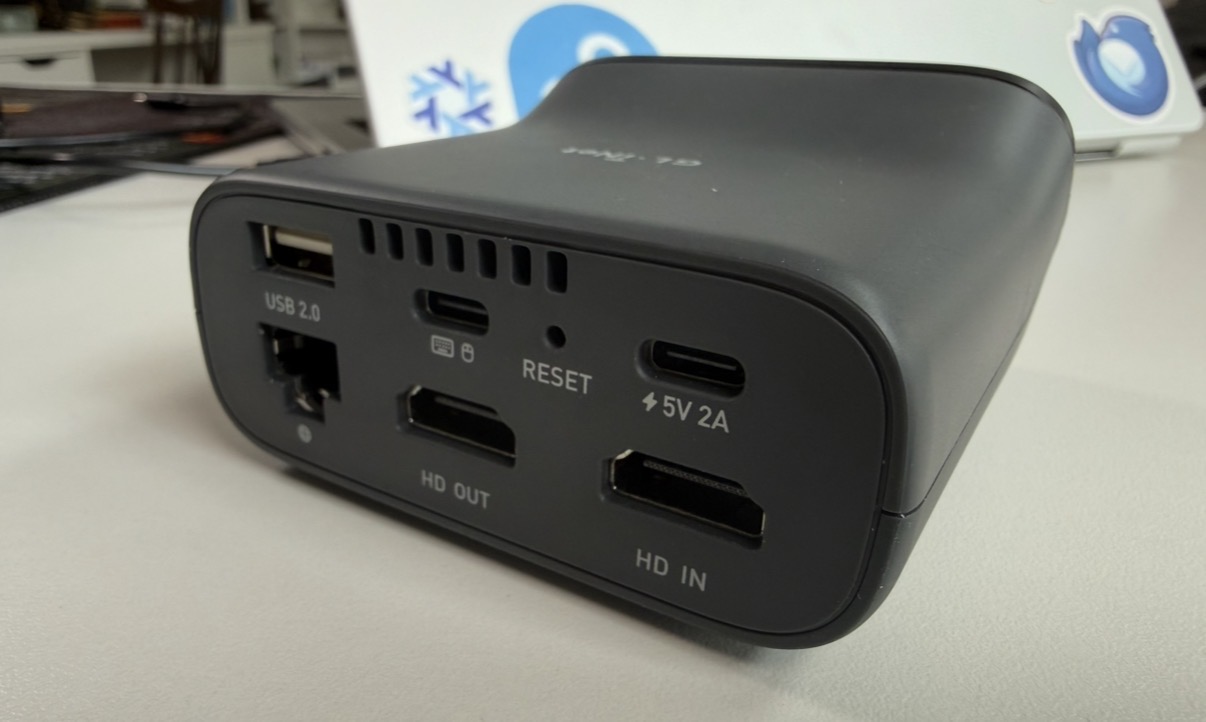
On the back: USB 2.0, USB-C for peripherals (keyboard/mouse emulation to the target), a reset pin, 5V/2A power, Ethernet, HDMI out, and HDMI in. The HDMI-in is what the KVM captures from the target machine, and the HDMI-out is a passthrough, so you can leave the Comet Pro inline with your main desktop without the monitor going dark when you're using the machine normally.
The Web UI
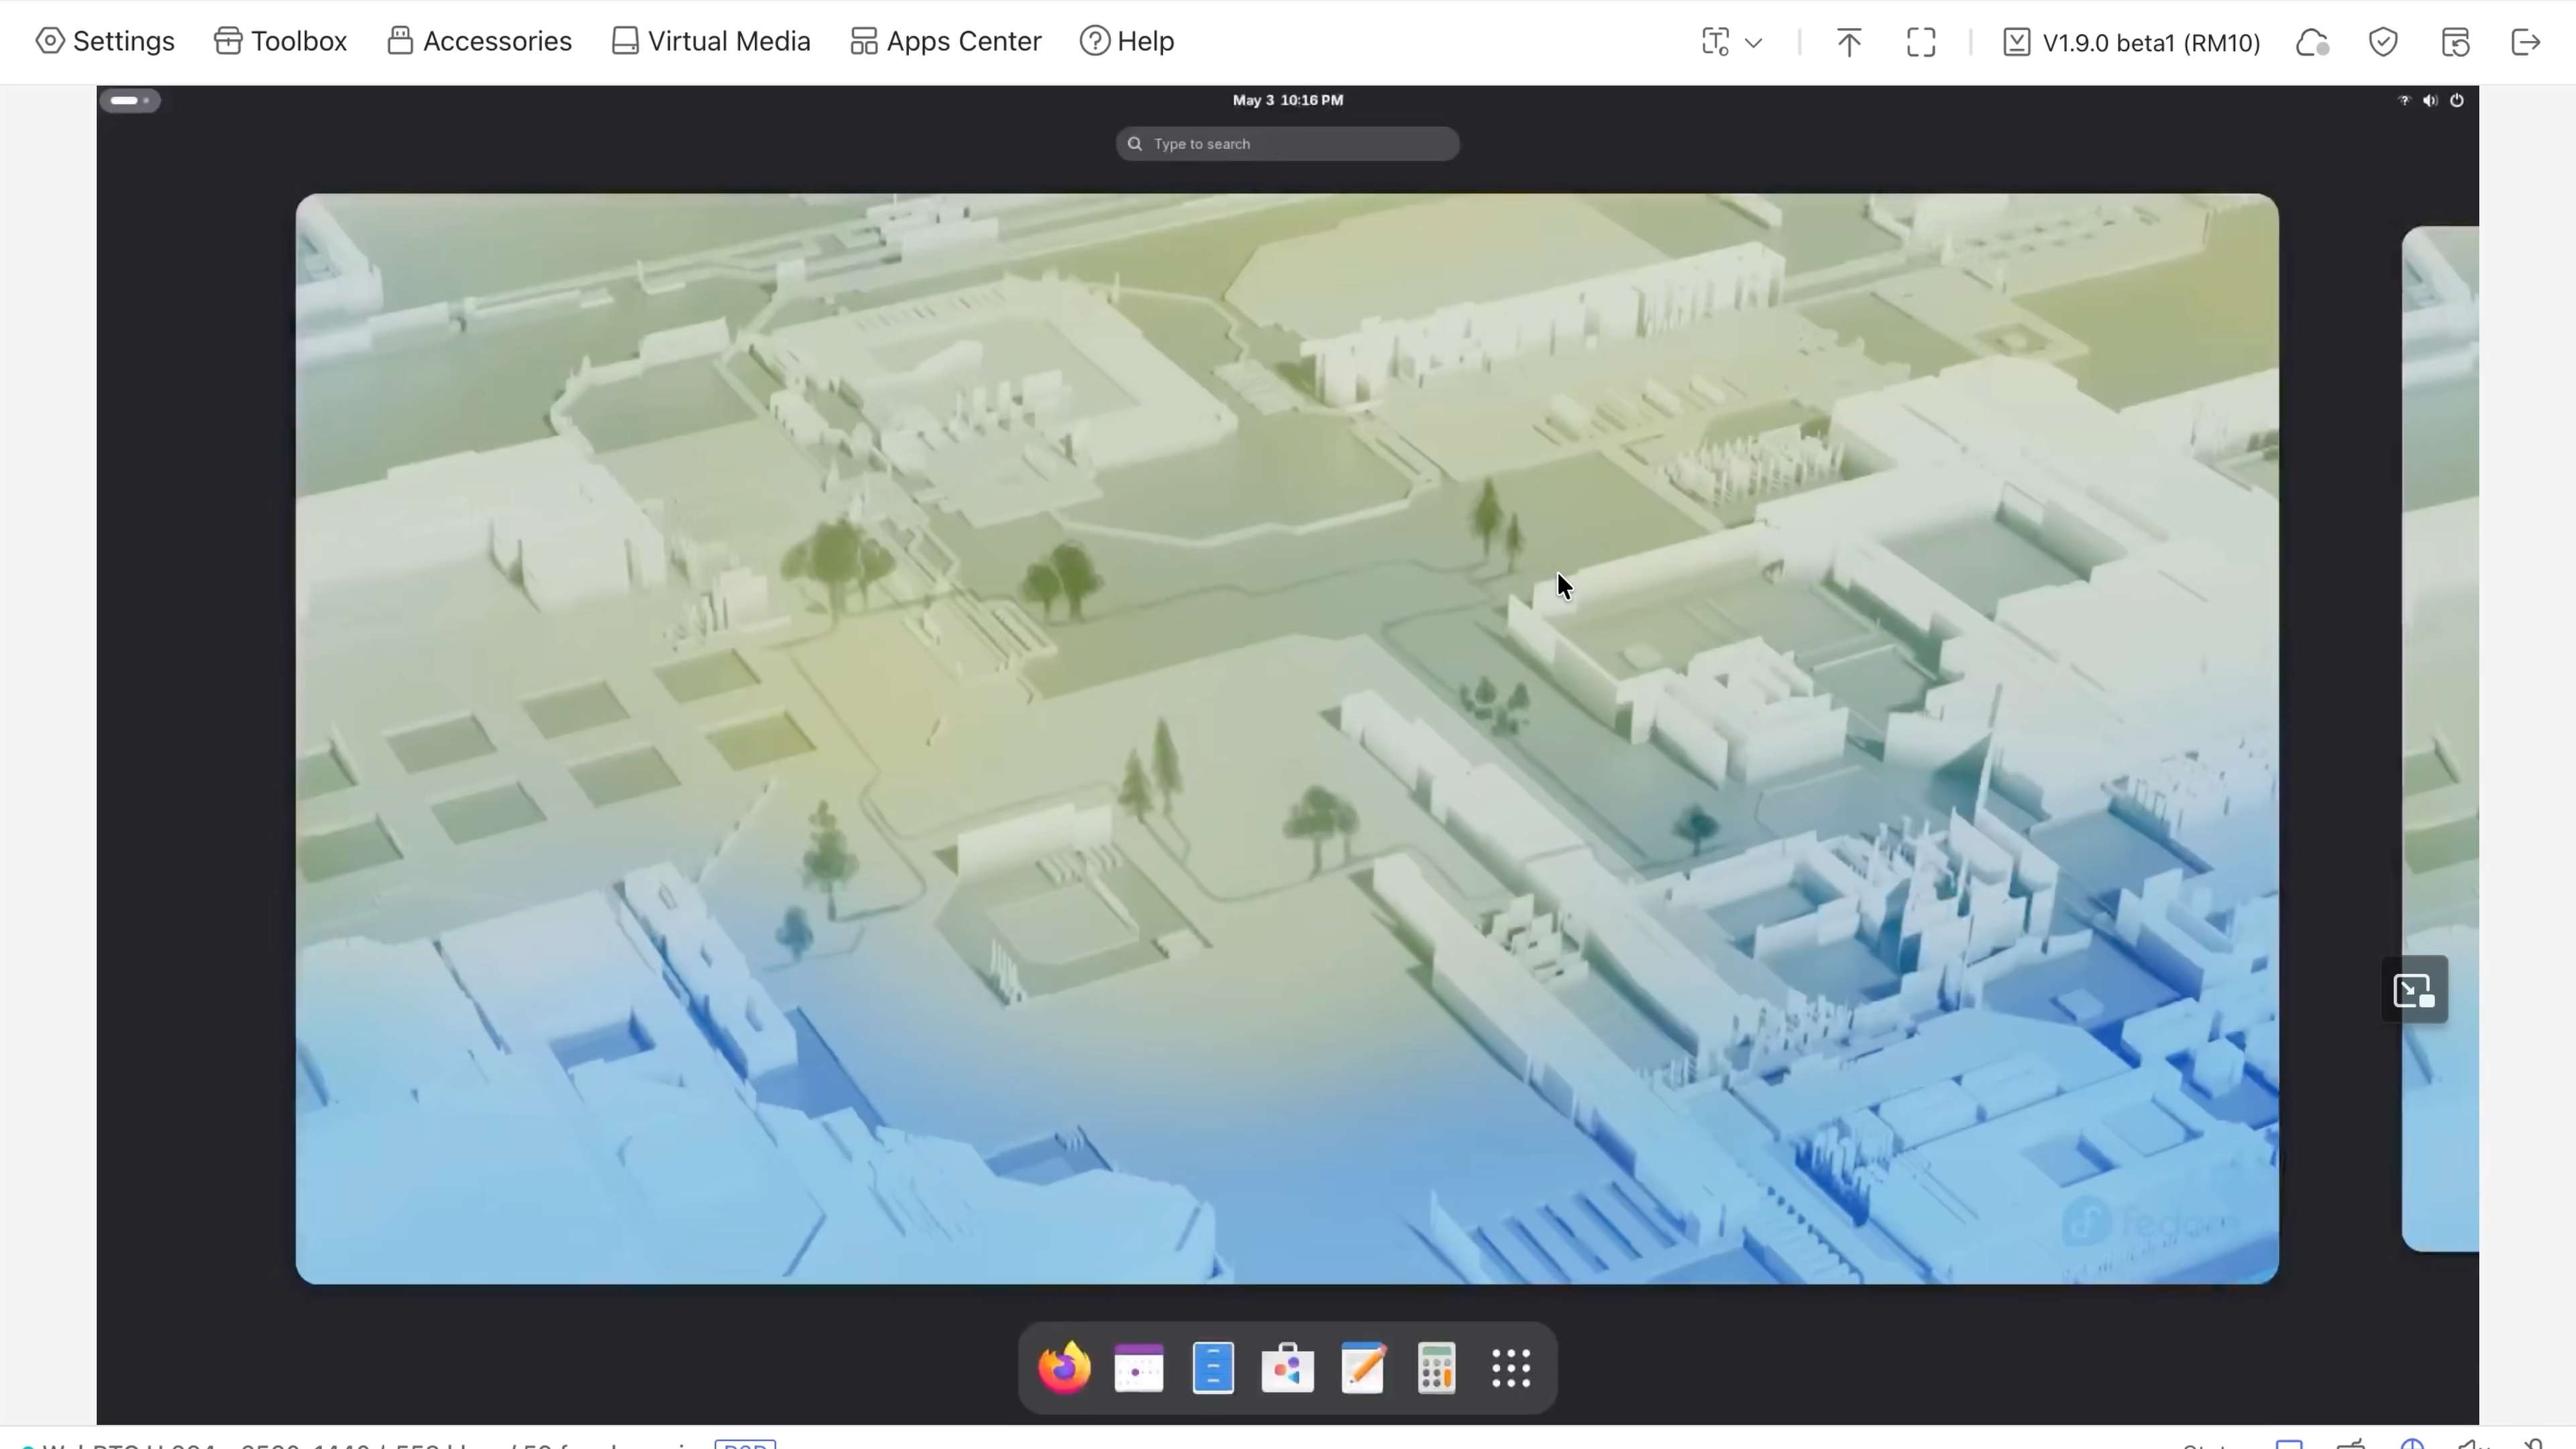
First-boot setup is short: set an admin password from the touchscreen (or skip it and finish in the web UI), pick Wi-Fi or just use Ethernet, and you're done. Once it's on the network, you point a browser at the device's IP and you get the KVM web interface. You'll want to set the admin password on first connect if you didn't already.
Firmware version: the NetBird integration shown here requires firmware 1.9 or later. Update from the device's web UI under System → Upgrade before continuing.
Worth poking at before we wire up NetBird:
- Video settings let you trade quality against responsiveness. Bump resolution and quality up if you're on a good link; switch the transfer method to Fast response if you're on something flakier or just want a snappier feel.
- Toolbox (top of the UI) is where useful tools live: a paste-text-into-the-target field, keyboard shortcuts, wake-on-LAN, and a full terminal session into the Comet Pro itself. We'll come back to that terminal.
- Virtual media lets you mount a remote folder as a USB drive on the target. Drag a file in, and it shows up on the target machine as if you'd plugged in a thumb drive. Handy for getting an installer or a debug script onto a machine that's not otherwise reachable.
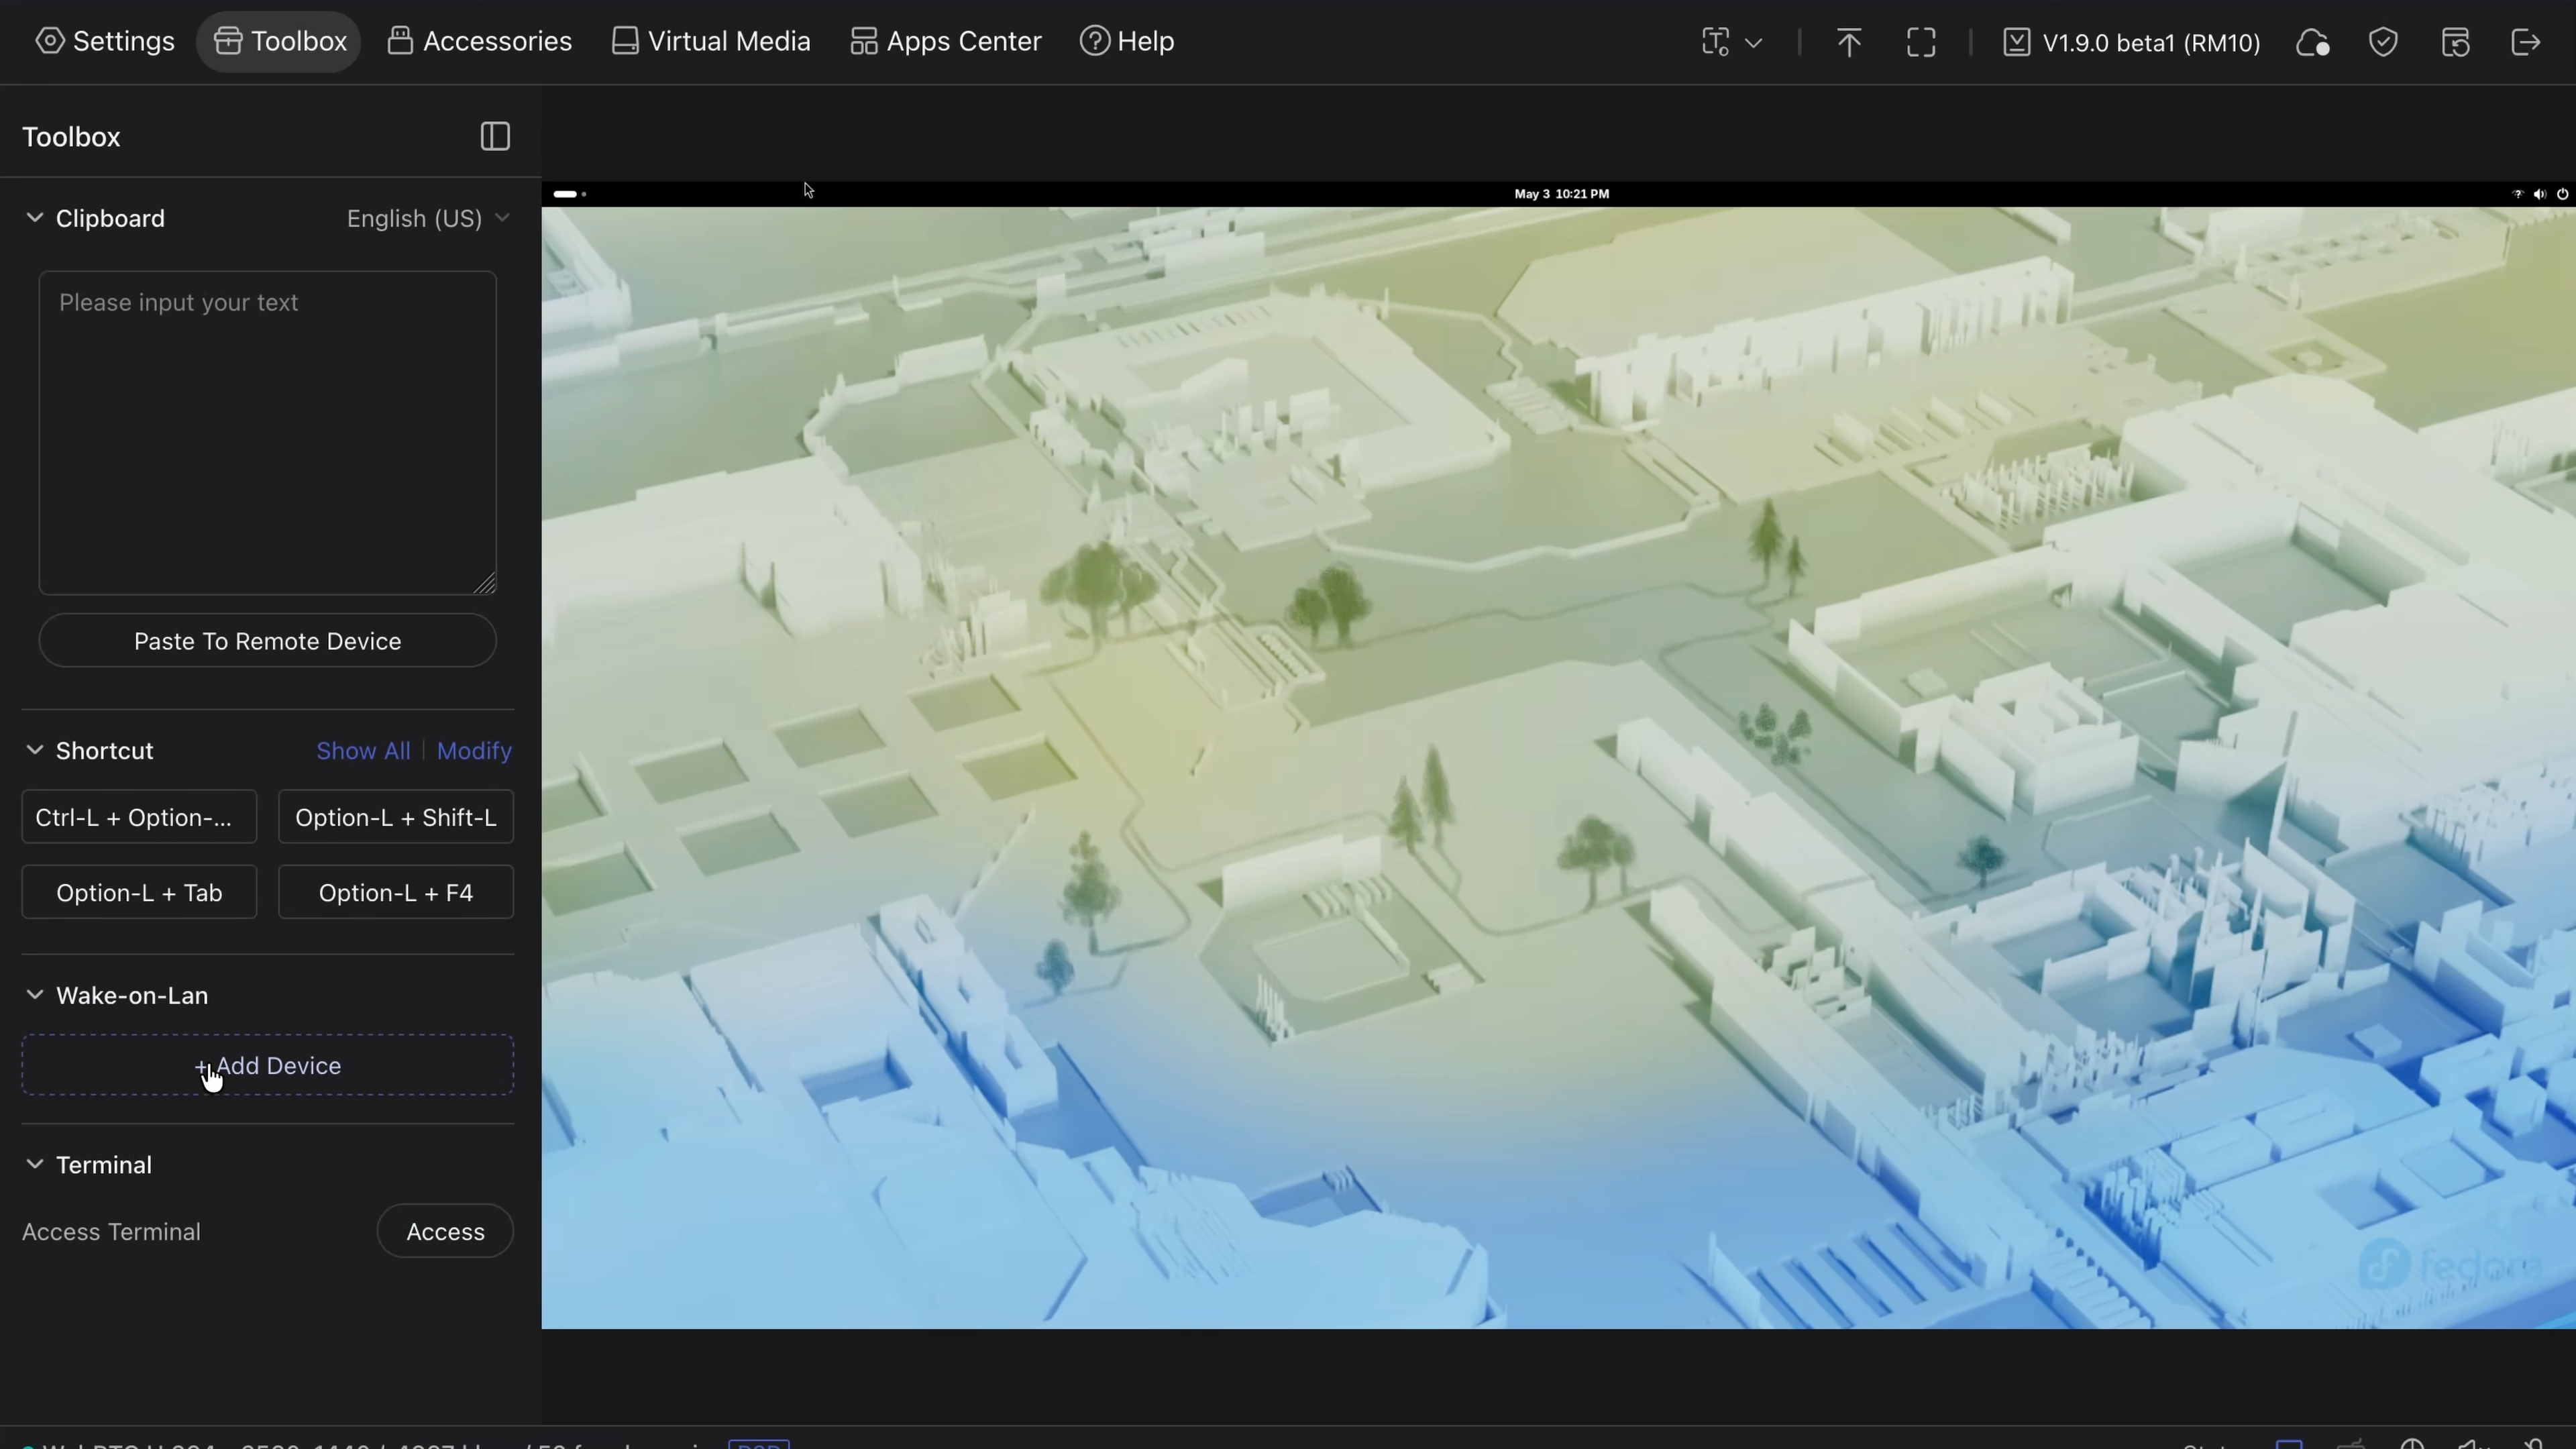
There's also a built-in keyboard, a mouse-jiggler, microphone/speaker passthrough, and color-mode and time-zone settings. Worth a pass through once when you're setting up.
Connecting to NetBird
The new bit. You can do this from either the touchscreen on the front of the device or the web UI's App Center. Both expose the same NetBird controls for basic setup, so use whichever is closer to hand.
In App Center (or VPN on the touchscreen), you'll see NetBird as of firmware 1.9:
Securely access your devices using an open-source WireGuard-based overlay network with SSO, MFA, and granular access controls.
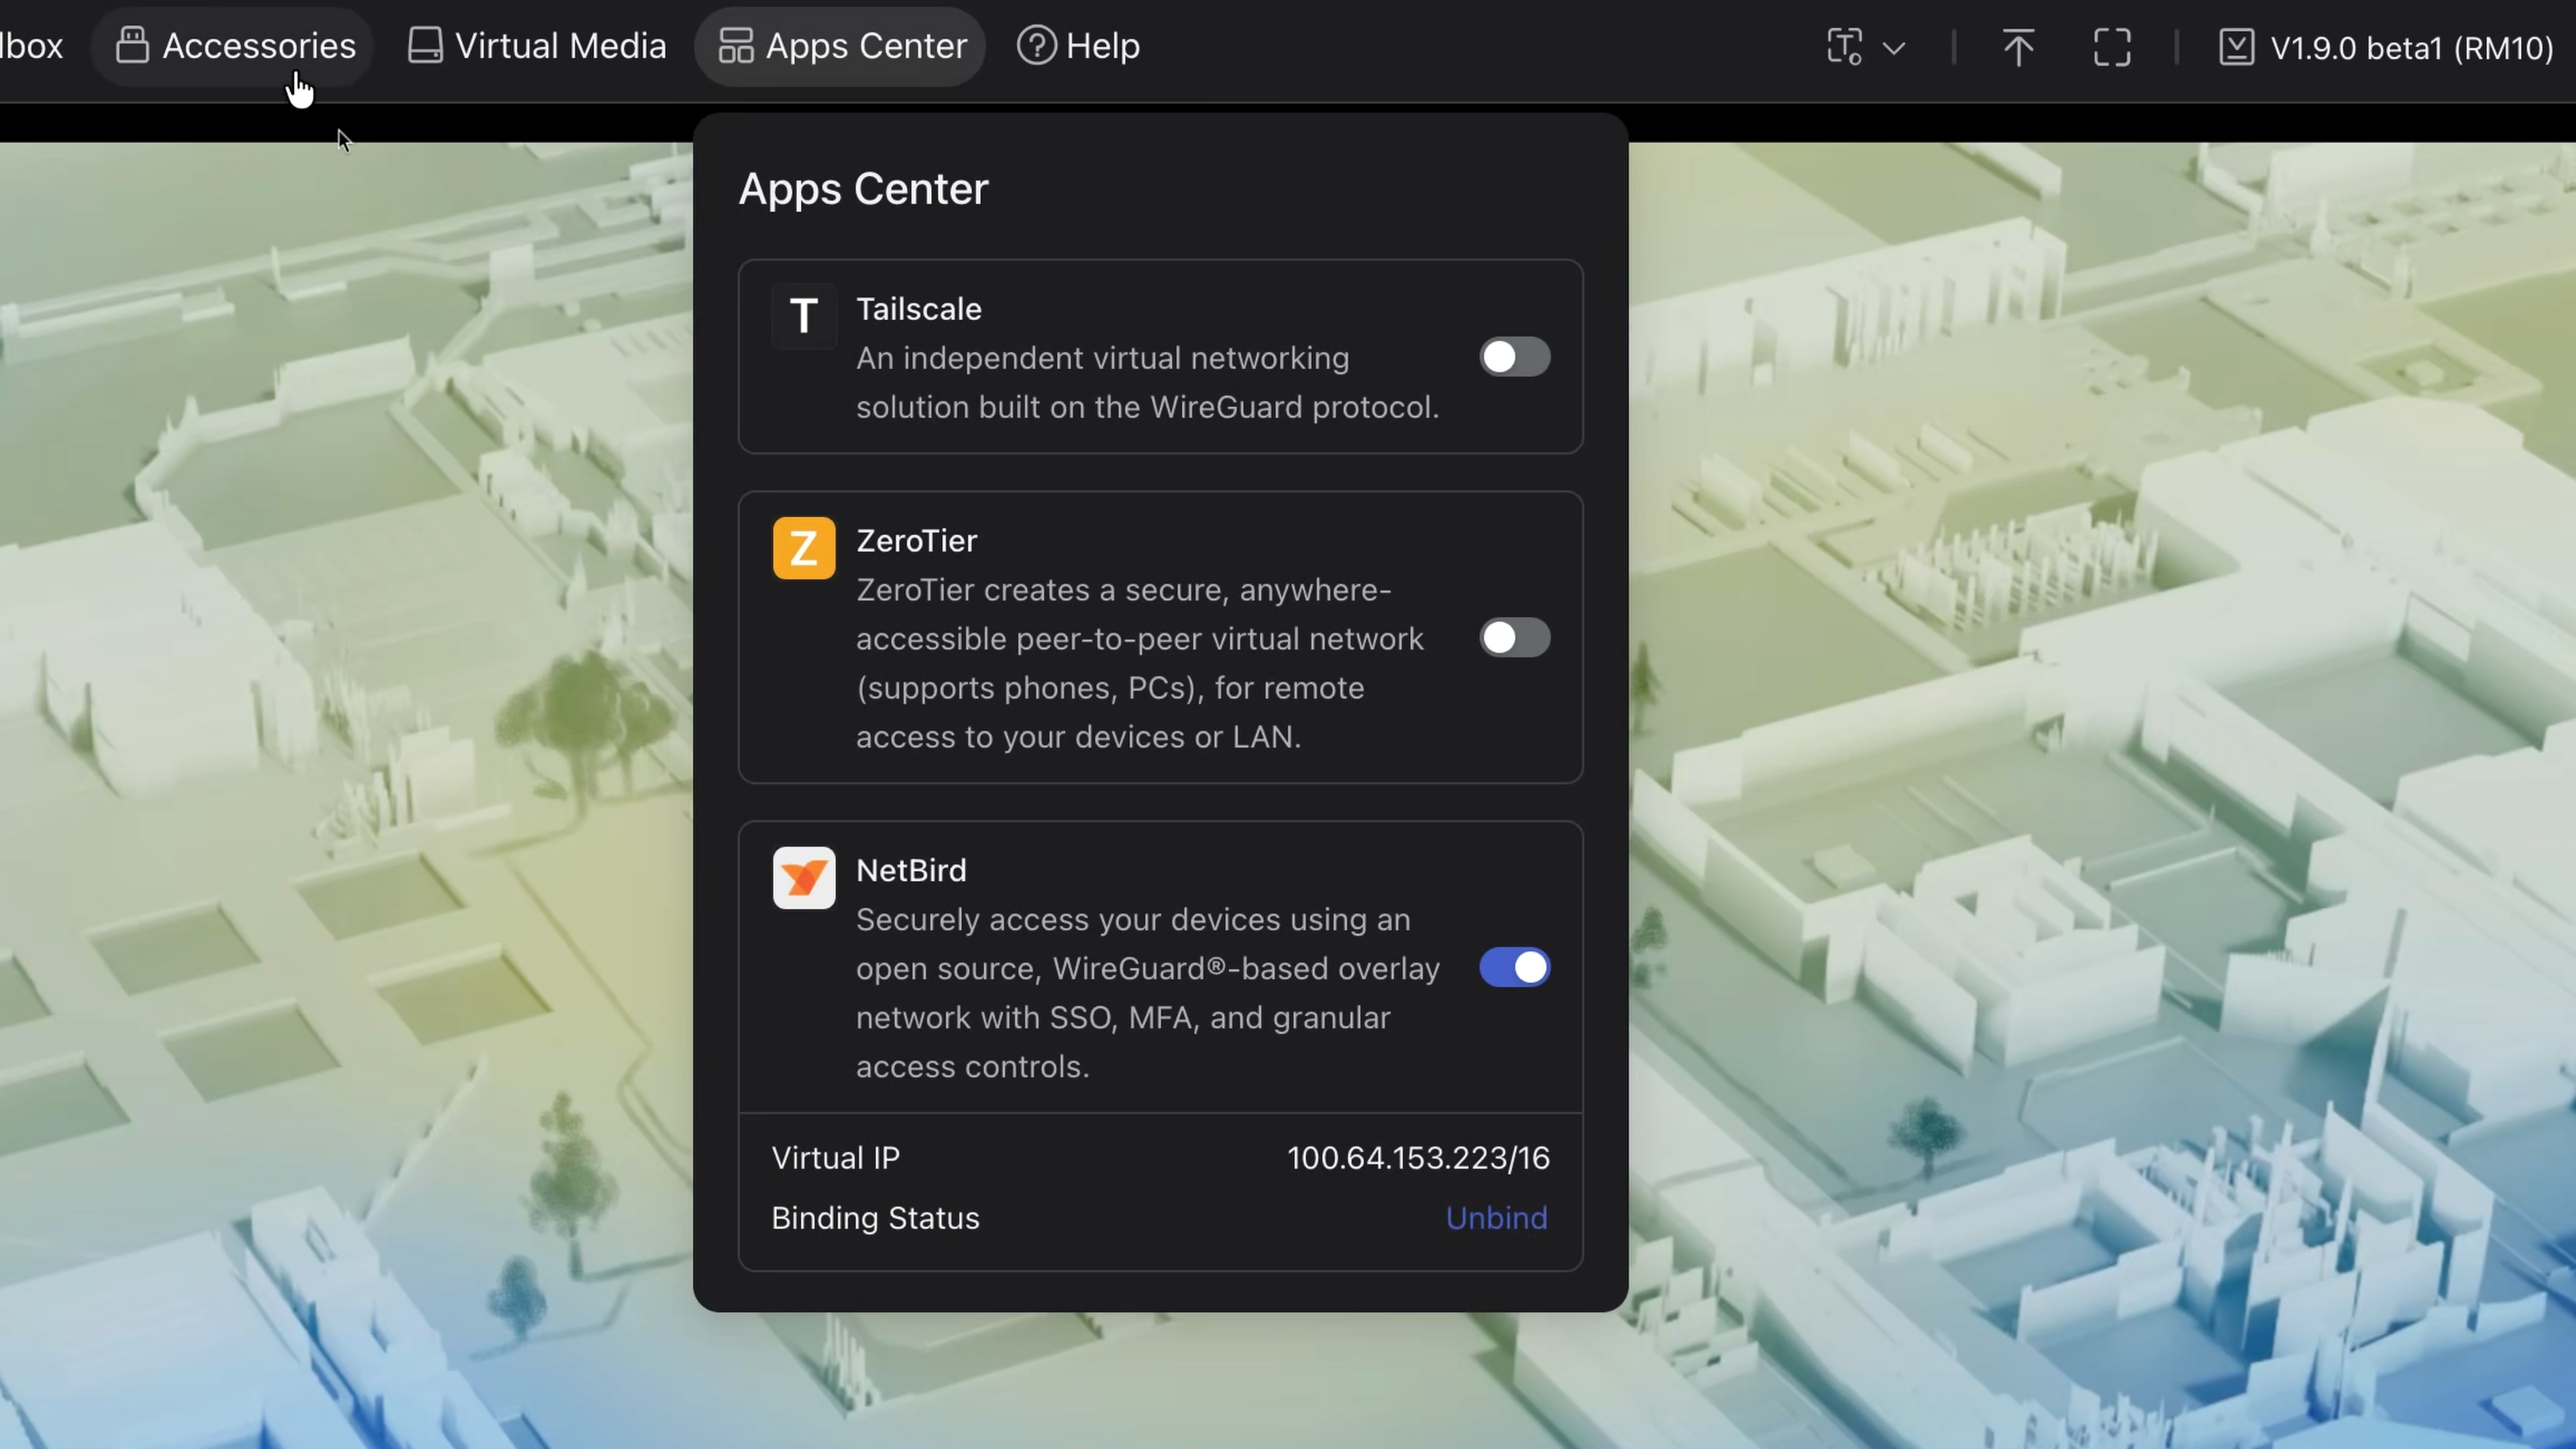
And the same NetBird entry on the touchscreen, under VPN:
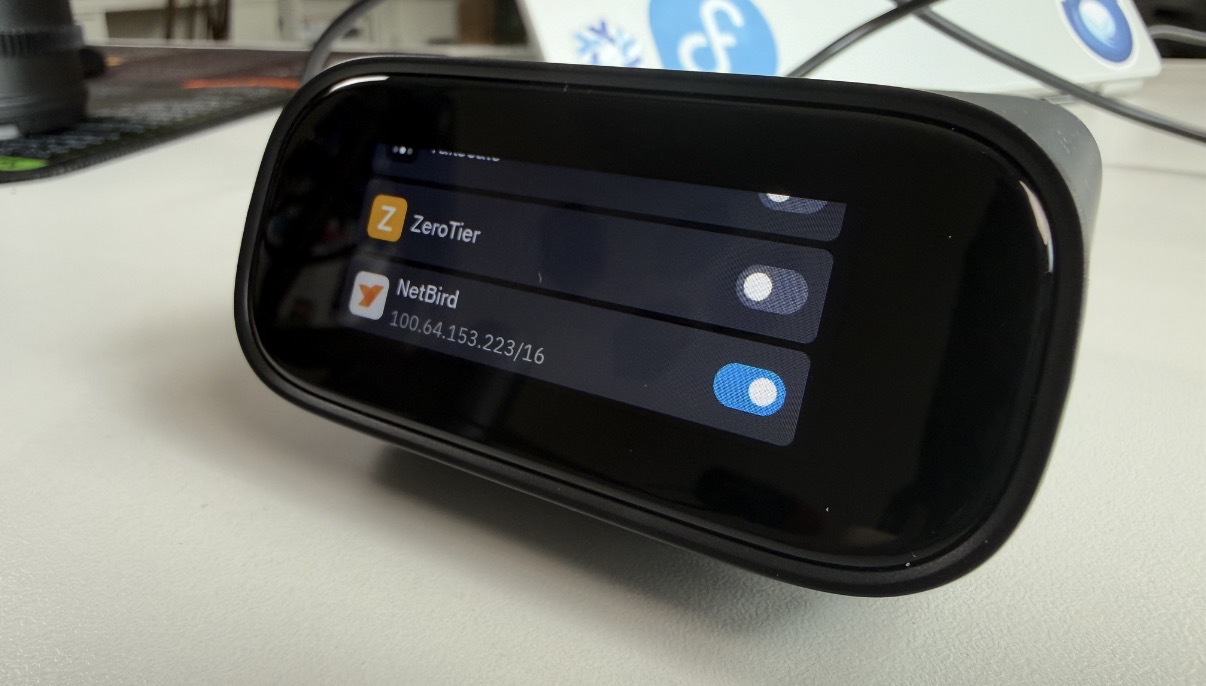
Toggle it on. From here there are two paths depending on whether you're on NetBird Cloud or self-hosted.
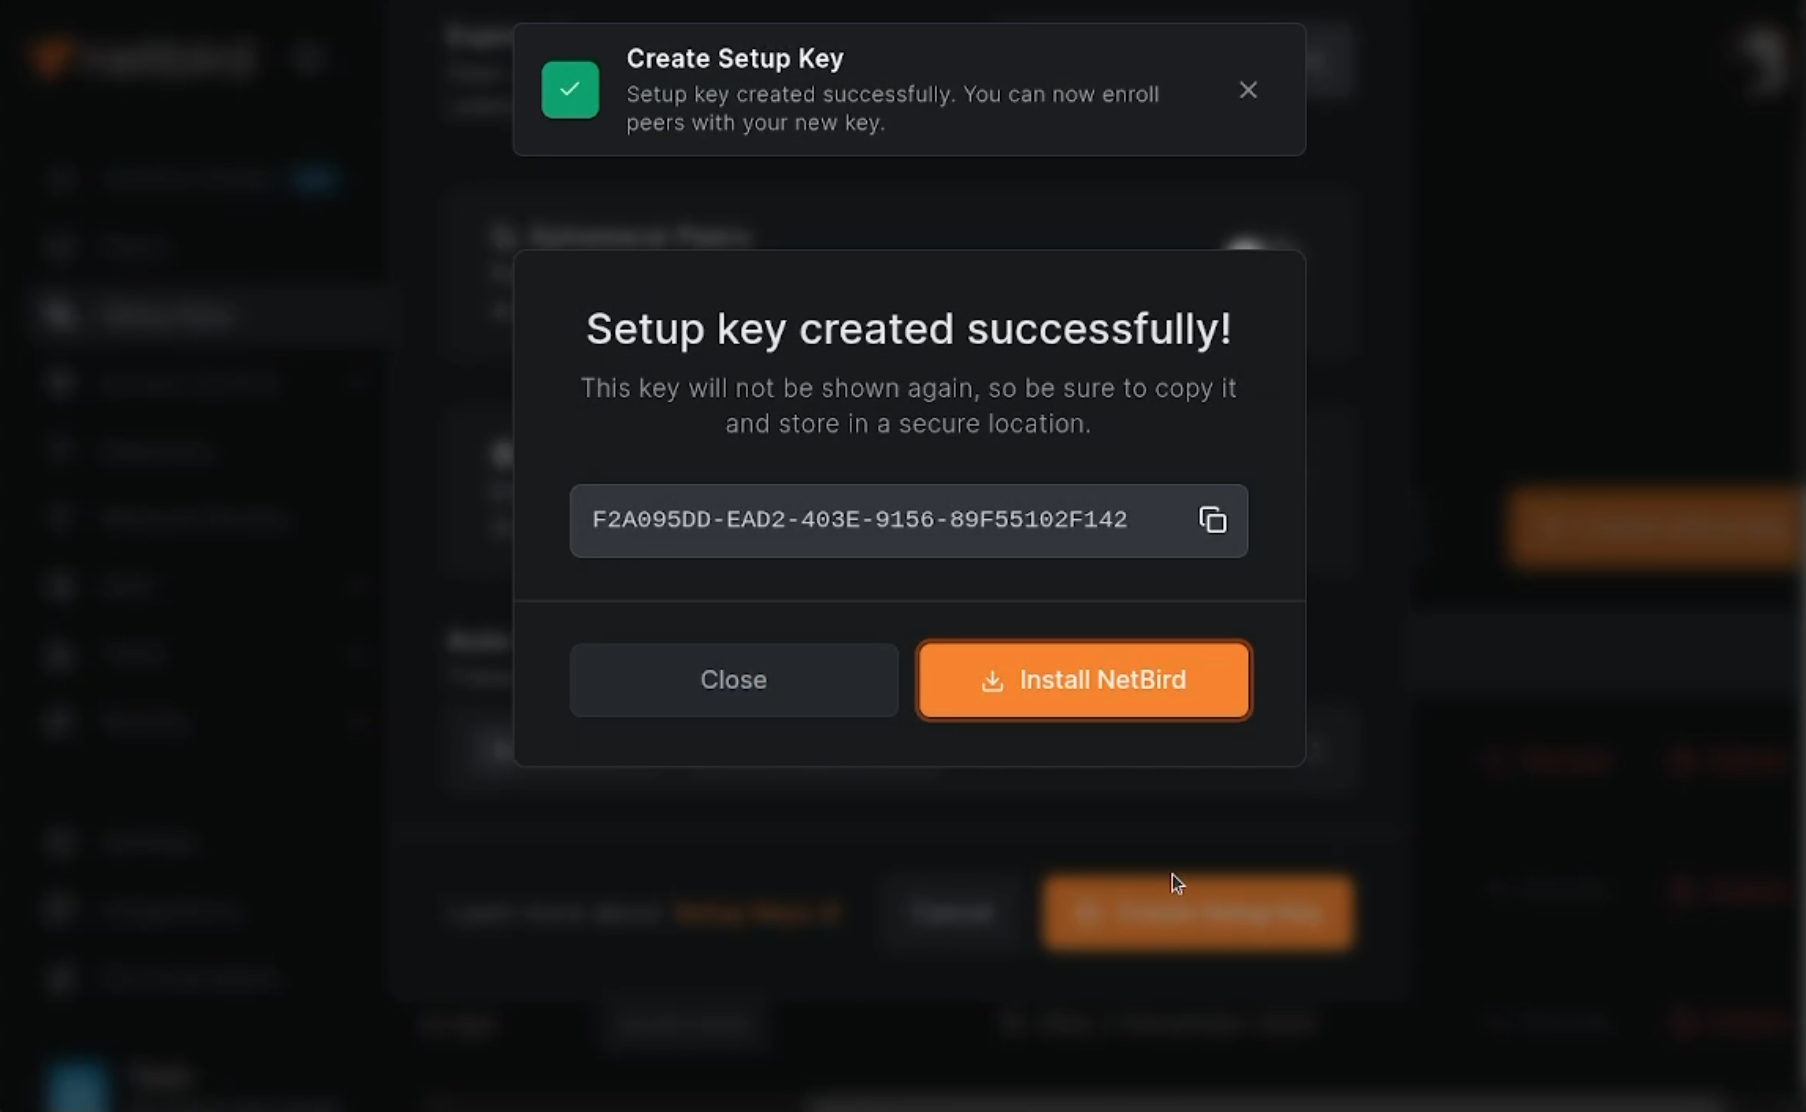
NetBird Cloud — Two Clicks
If you're using NetBird Cloud, you'll get a Bind device button right next to the toggle. Tap it, a browser tab opens with a device-confirmation prompt (on the touchscreen you'll see a pairing code instead, which you confirm from any browser on your phone or laptop), you click confirm, and the Comet Pro joins your network. The device's NetBird IP shows up in the same pane once it's connected.
That's the whole thing. No setup key to copy, no CLI.
Self-Hosted — Use the Built-In Terminal
If you're running self-hosted NetBird, the Bind-device button targets NetBird Cloud, so you'll wire it up by hand instead. Easy enough since the Comet Pro ships a full Linux shell behind the web UI toolbox's Terminal button. In a future update they may add the ability to use and options in the UI.
-
In your self-hosted dashboard, go to Setup Keys and create a new one. Name it something like and add it to whatever group you want the KVM to live in — a dedicated or group is a good idea, since a KVM is privileged access and you probably don't want every peer in your network reaching it.
-
Copy the Run NetBird / install string from the dashboard. It includes both the management URL and the setup key as flags.
-
Open the Comet Pro's terminal from the web UI toolbox, paste the install command, and hit enter.
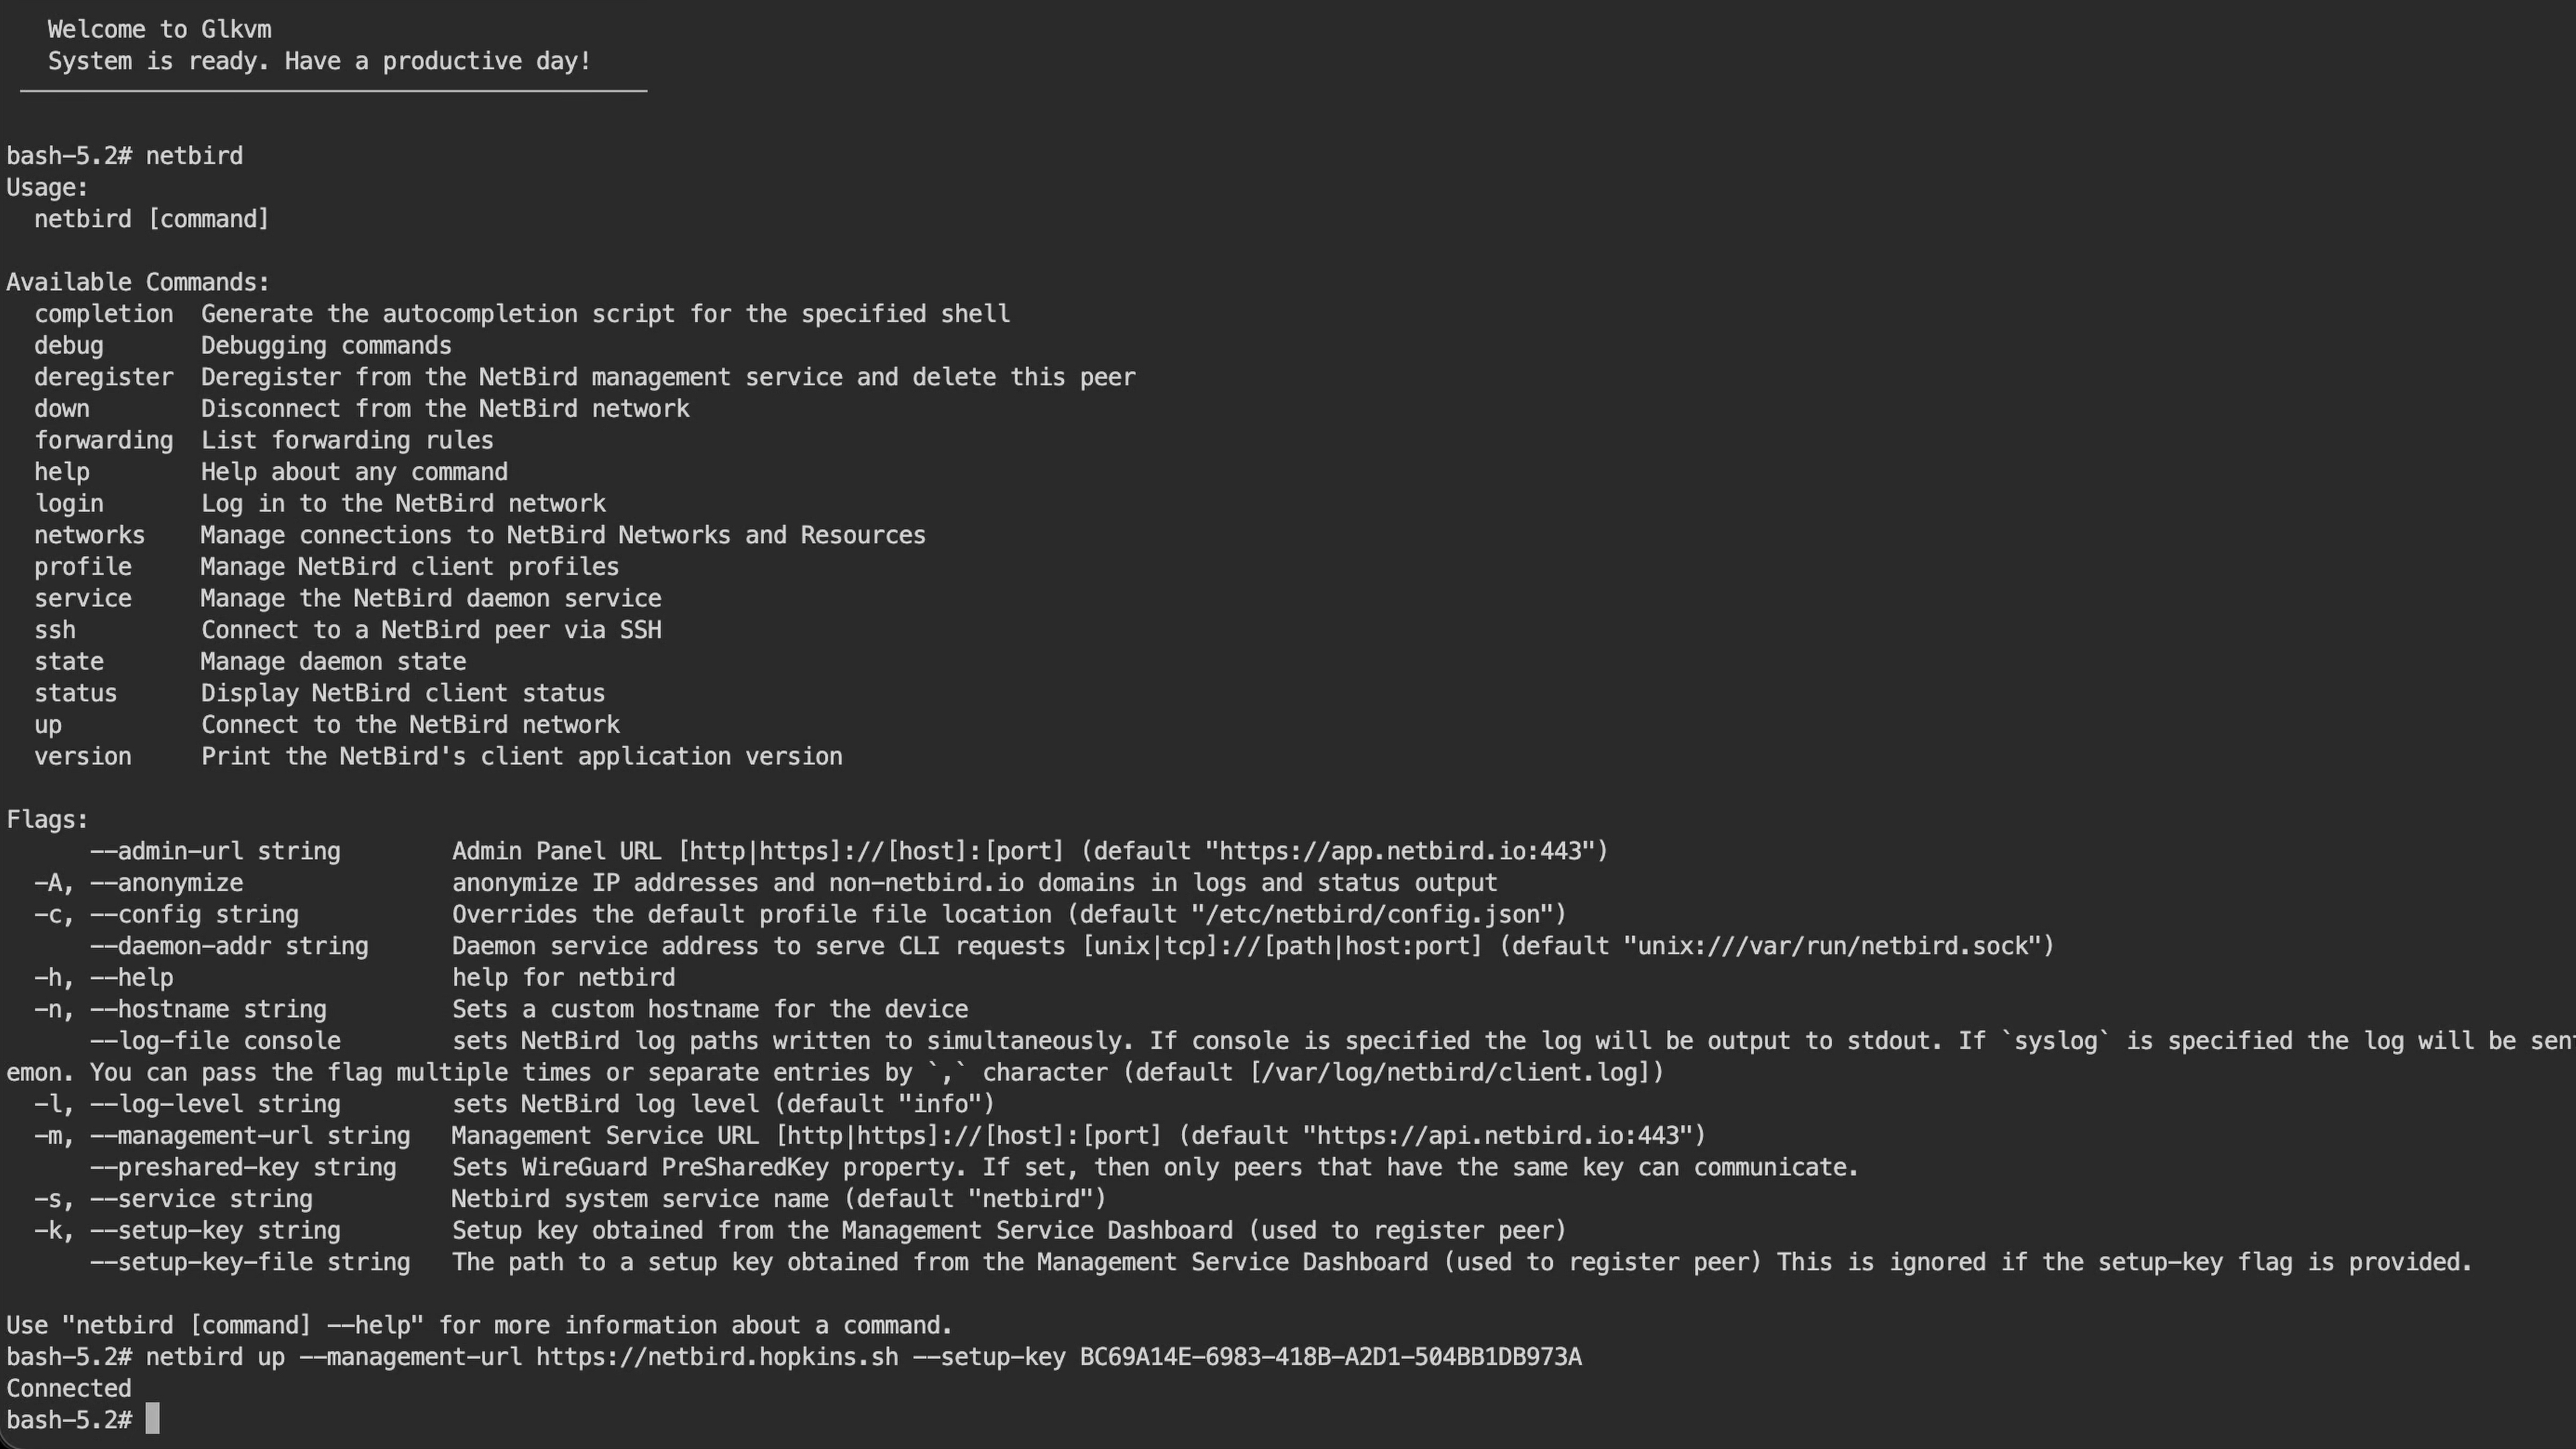
Once it finishes, head back to App Center → NetBird (or the touchscreen NetBird tile) and you'll see the Comet Pro's assigned NetBird IP. In the dashboard, the new peer shows up with the hostname you set on the device.
Using the KVM Over NetBird
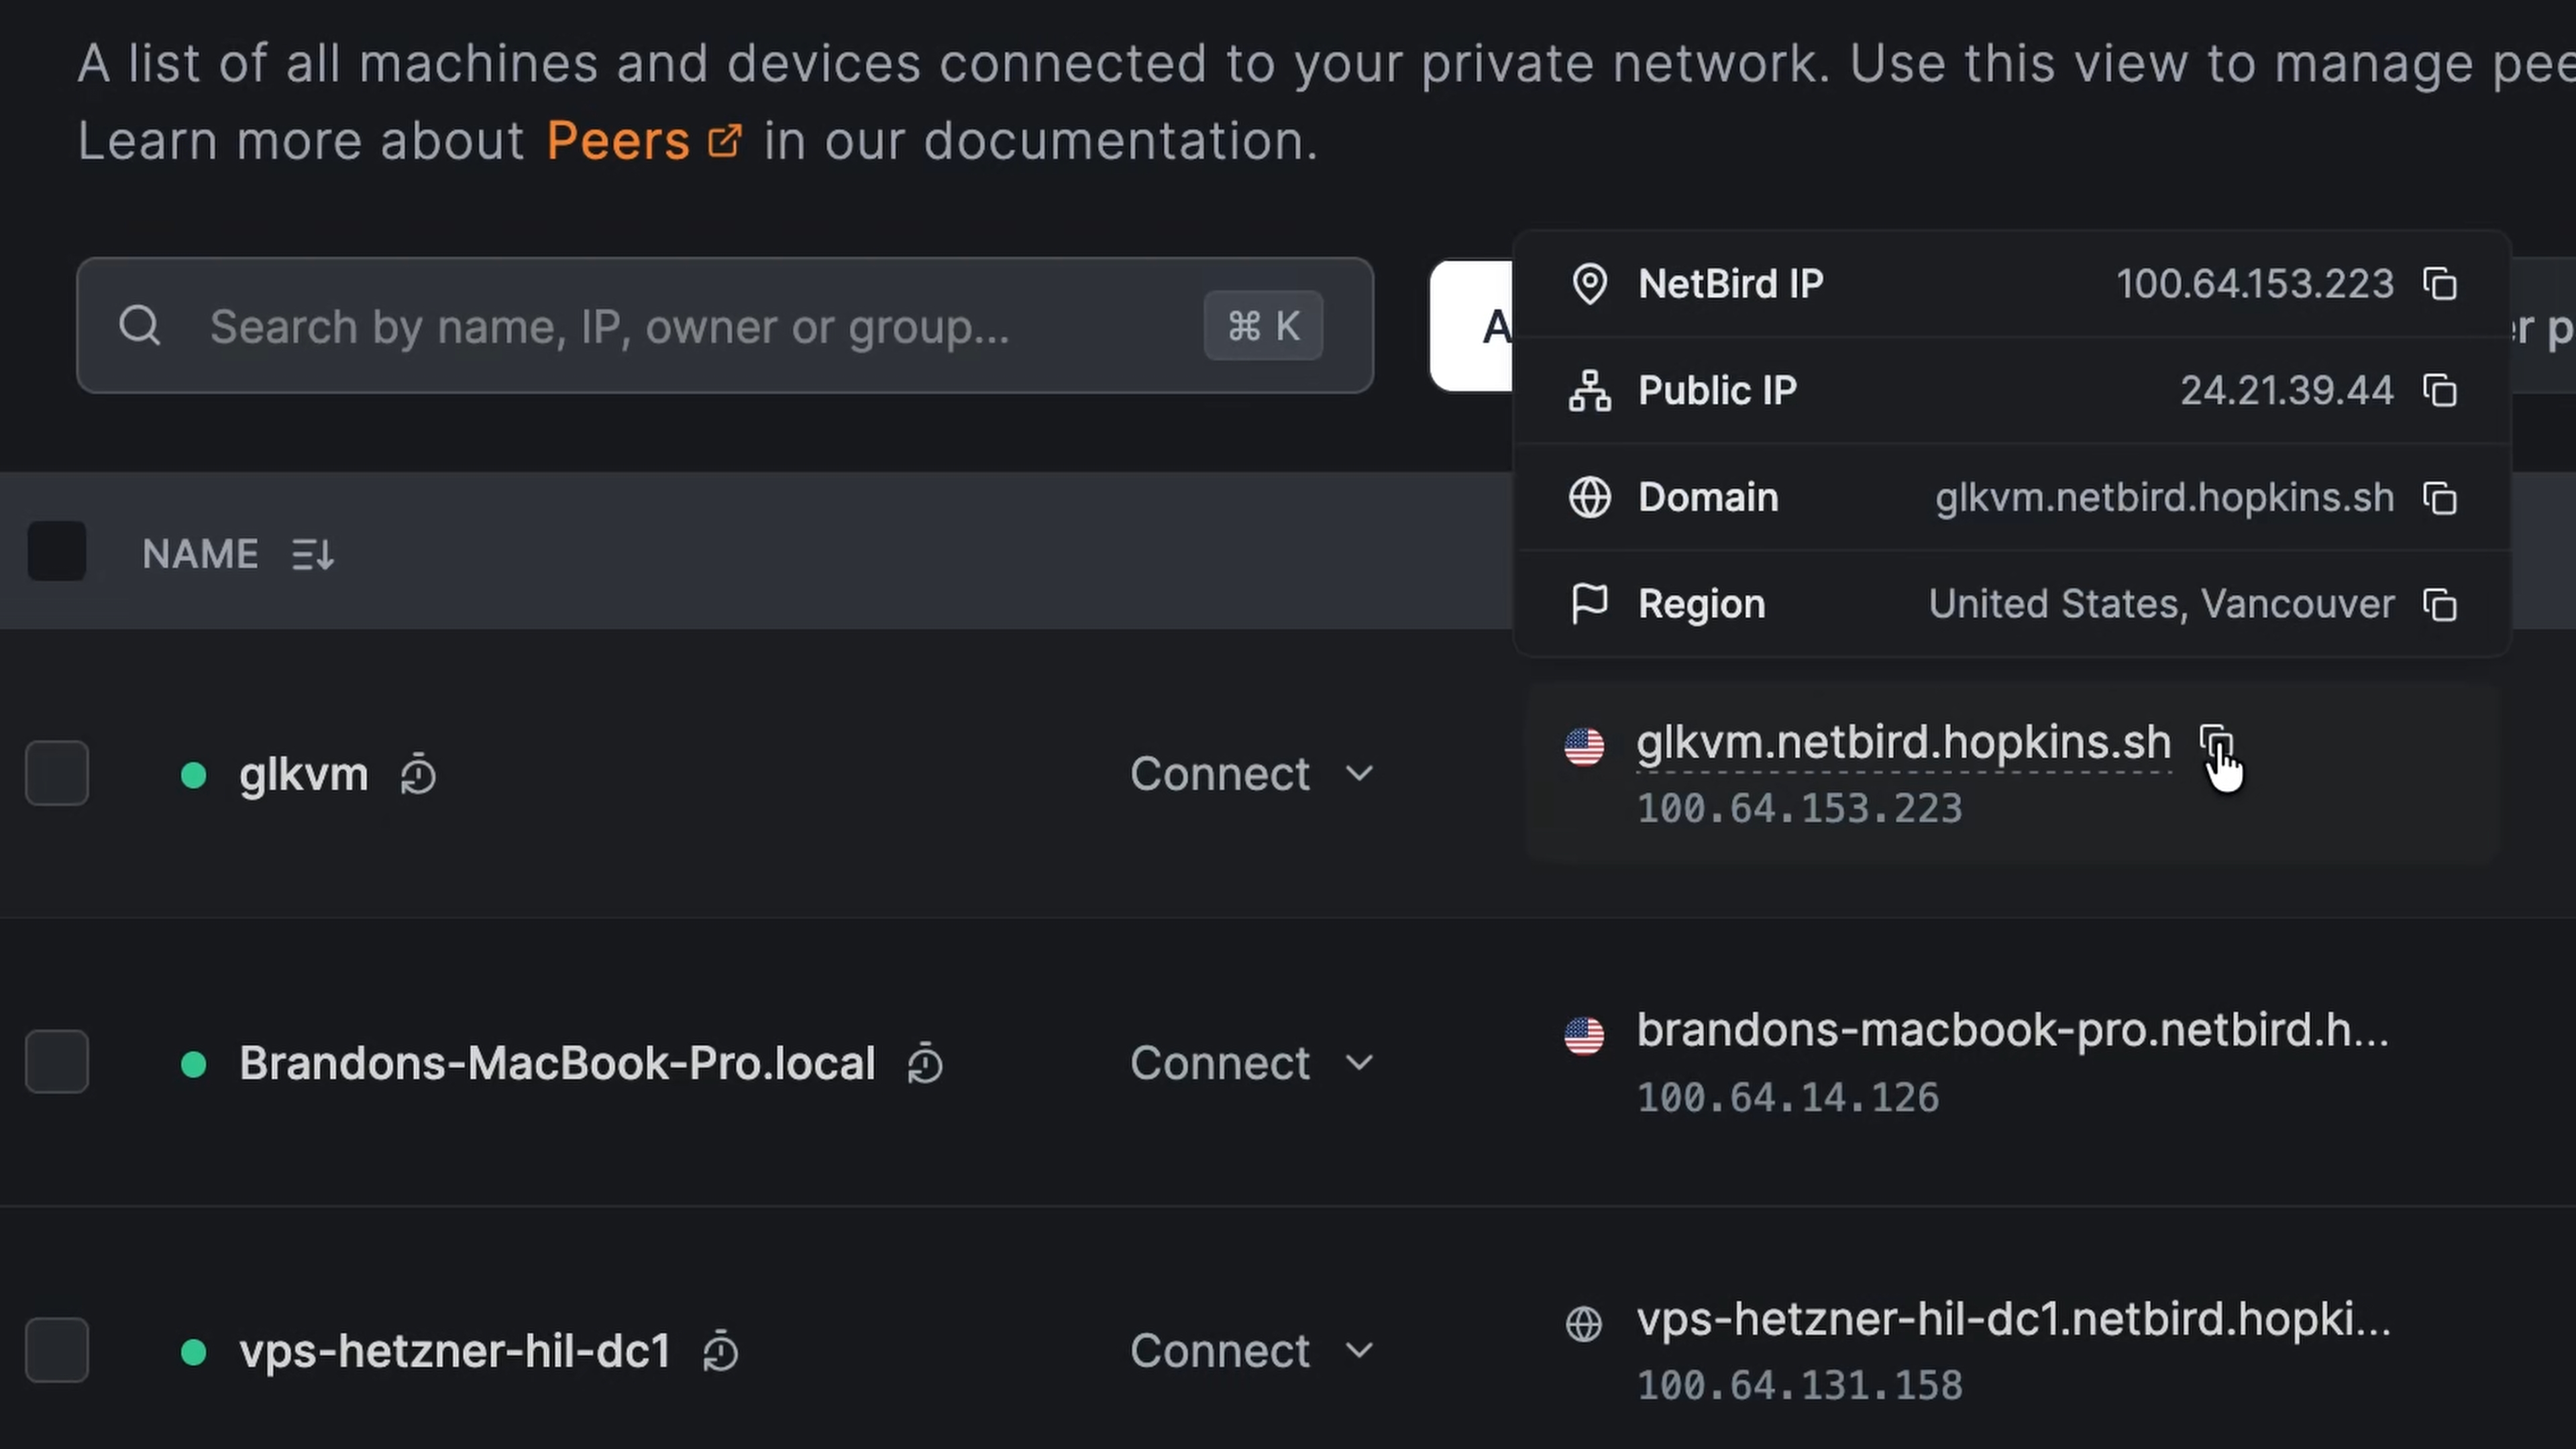
Once the Comet Pro is on your NetBird network, you don't need to connect to its local IP anymore. From any device that's also on the same NetBird network, open (or the device's NetBird DNS name) in a browser. The KVM web UI loads exactly the same way, with the difference being that you can be on hotel Wi-Fi, on cellular, on the other side of the planet, and it still works.
Log in with the admin password you set earlier and you're back in control of the target machine.
Related Reading
- How to Set Up NetBird on PiKVM for Secure Remote KVM Access — the DIY counterpart, with a tmpfs-overlay workaround for PiKVM's read-only filesystem
- NetBird Documentation
- GL.iNet Comet Pro (GL-RM10) product page
- GL.iNet Comet Pro firmware 1.9.1 release notes