
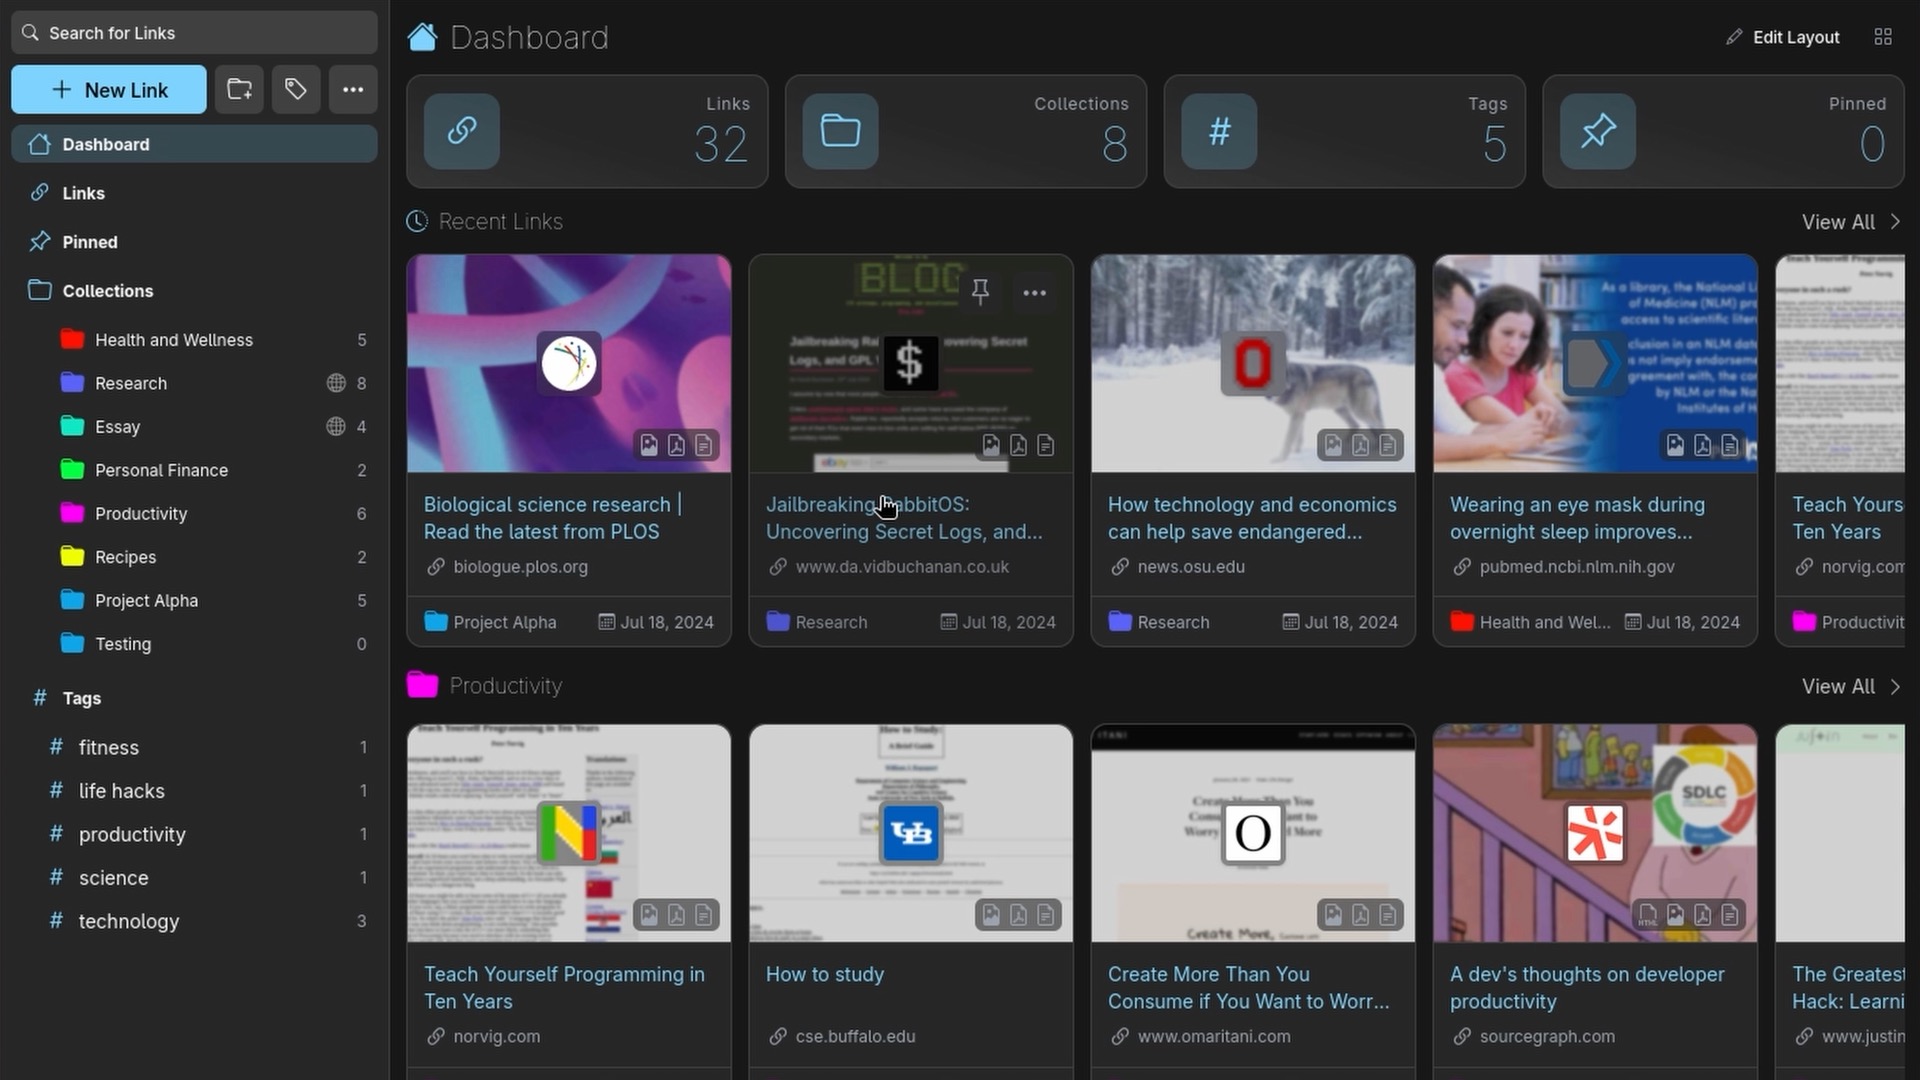
Hello everybody! Today we're checking out a different open source project called Linkwarden . As they put it, it helps you collect, read, annotate, and fully preserve what matters, all in one place. It's a link manager, very similar to something like Pocket from Mozilla (rest in peace), and it's a great home for all those tabs you swear you'll read later.
With Linkwarden you can organize links into collections and sub-collections, add tags, pin your favorites, and share or collaborate on collections with other people. The preservation side is the real killer feature though. It automatically captures a screenshot, a PDF, and a full single-file copy of each page, with an optional Wayback Machine snapshot on top, so your links still work even if the original site disappears. There's a reader view with highlighting and annotations, RSS feed subscriptions, and full text search across everything. They have extensions for Chrome, Firefox, and the rest, so you can drop pages in without ever leaving the site you're on, and they've recently come out with their own apps for iOS and Android. If you want to poke around first, they have a live demo you can try.
Now, you can of course just use their cloud offering, but in this guide we're going to quickly spin it up with Docker and then connect to it from anywhere in the world without opening up any ports on your home network. That second part is where NetBird comes in.
What You'll Need
You'll need somewhere to run this. Any Linux box with Docker will do, a VM, a mini PC, or a VPS from an external provider. If you followed our Proxmox getting started guide , the community scripts project has a nice Linkwarden script that spins up an LXC container and does most of the heavy lifting for you. And if Docker is new to you, I do recommend our getting started with Docker guide first, it'll help you understand the concepts we're diving into.
For this walkthrough I'm installing it on my Fedora server over SSH, with everything living in a folder like I do for most of my projects.
Installing Linkwarden with Docker
Let's go ahead and make a directory for Linkwarden and hop into it:
Linkwarden keeps a ready-to-go Compose file and an environment sample right in their GitHub repository , so we can just pull both down with :
If you open up the Compose file, it's pretty simple. There are three containers: Linkwarden itself, a Postgres container for your actual database, and Meilisearch for search. All the data lands in subdirectories right next to the Compose file (, , and ), which is exactly why I like giving each project its own folder.
Do note that starts with a dot, so a plain won't show it. Run if you want to see it. Now rename it to so Docker Compose actually picks it up:
Time to fill in the important bits:
The sample has a whole bunch of options and we're not going through all of them here, that's what their environment variables documentation is for. For a basic setup you only need to touch a few things:
- stays as is () since we're keeping this local.
- , , and each need their own long random value. That last one isn't obvious from the sample file, but the official setup docs call for it, and search won't work right without it.
You can use whatever generator you like, but OpenSSL is right there:
Run it once per variable, drop each value on in, and obviously don't share these with anyone. Save the file and let's fire it up:
I'm leaving off on purpose the first time, because I want to actually see the initial logs. If something goes wrong, we can pinpoint the error pretty quick instead of guessing. Once you see it settle down, hit and bring it back up detached so it keeps running in the background:
Now head to in your browser. Do note that 3000 is a very common port, so if something else on the same box is already using it, change the left side of the port mapping in the Compose file. Click "I am new here", sign up for your account, and sign on in. And there we go, your own local Linkwarden instance.
One more thing while we're here. The signup page stays open to anyone who can reach the instance, so once you've created accounts for everyone who needs one, go back into , set , and run again to apply it. We're going to lock down network access with NetBird anyway, but defense in depth is free here.
Adding Your First Links
Real quick, let's actually use the thing. For an example, I headed over to the new NetBird Community Hub and checked out the projects and integrations section, where you can find a bunch of cool stuff community members and third parties have made for NetBird. I copied the link to one of the GitHub repos, hit "Create New Link" in Linkwarden, and dropped it on in. It grabs the page title and image for you automatically.
Editing is pretty simple too. I made a new collection called GitHub Repos, edited the link to move it in there, and added a NetBird tag. Collections, tags, pins, that's really all there is to the organizational side. From there you can log in with the mobile apps and browser extensions and start collecting for real.
Imports, AI Tagging, and Updates
A few things the basic setup doesn't show you that are absolutely worth knowing about.
First, you don't have to start from zero. Under your profile photo, head to Settings and you'll find an import option that takes browser bookmark HTML exports from Chrome, Firefox, Safari, and the rest, plus direct imports from Pocket, Wallabag, Omnivore, and other Linkwarden instances. So if you're one of the many people who lost their reading list when Pocket shut down, this is your migration path. Export from the old service, drop the file on in, and Linkwarden preserves everything going forward.
Second, Linkwarden has optional AI tagging that analyzes the content of your links and tags them automatically, either generating new tags or sticking to predefined ones you choose. It works with a local model through Ollama if you want to keep everything on your own hardware, or with API providers like OpenAI and Anthropic if you'd rather not. It's all environment variables, so check their AI tagging docs if that's something you're into. Since it's tagging every link you save, a small local model is honestly plenty.
And for updates, it's the standard Docker Compose routine from the directory:
But here's the question: what happens when you're not on your local network? You've got the mobile app, you're out and about, and your bookmarks are sitting on a server in your house. That is where NetBird comes in.
Installing NetBird on the Server
There are really two options for getting NetBird. You can sign up for NetBird Cloud , which is completely free for up to 5 users and 100 devices, plenty for a home lab. Or you can completely self-host it on your own infrastructure, similar to what we're doing with Linkwarden. My personal instance is self-hosted, but everything below works the same either way.
Once you have your management dashboard, install NetBird on the device Linkwarden is running on. Technically it can be any device on the same network as the service if you use network routes , but installing it right on the host is the simplest path. Since this is a Linux box, the one-liner does the trick:
In the dashboard, go to Peers, click Add Peer, pick Linux, and generate a setup key. That gives you a command to paste into the server, which connects it to your NetBird network. Do note that setup keys are secrets, so keep them out of scripts and shell history. Verify with:
You'll see your NetBird IP in there, something from the range. Write that down, we'll use it in a second.
Access Policies
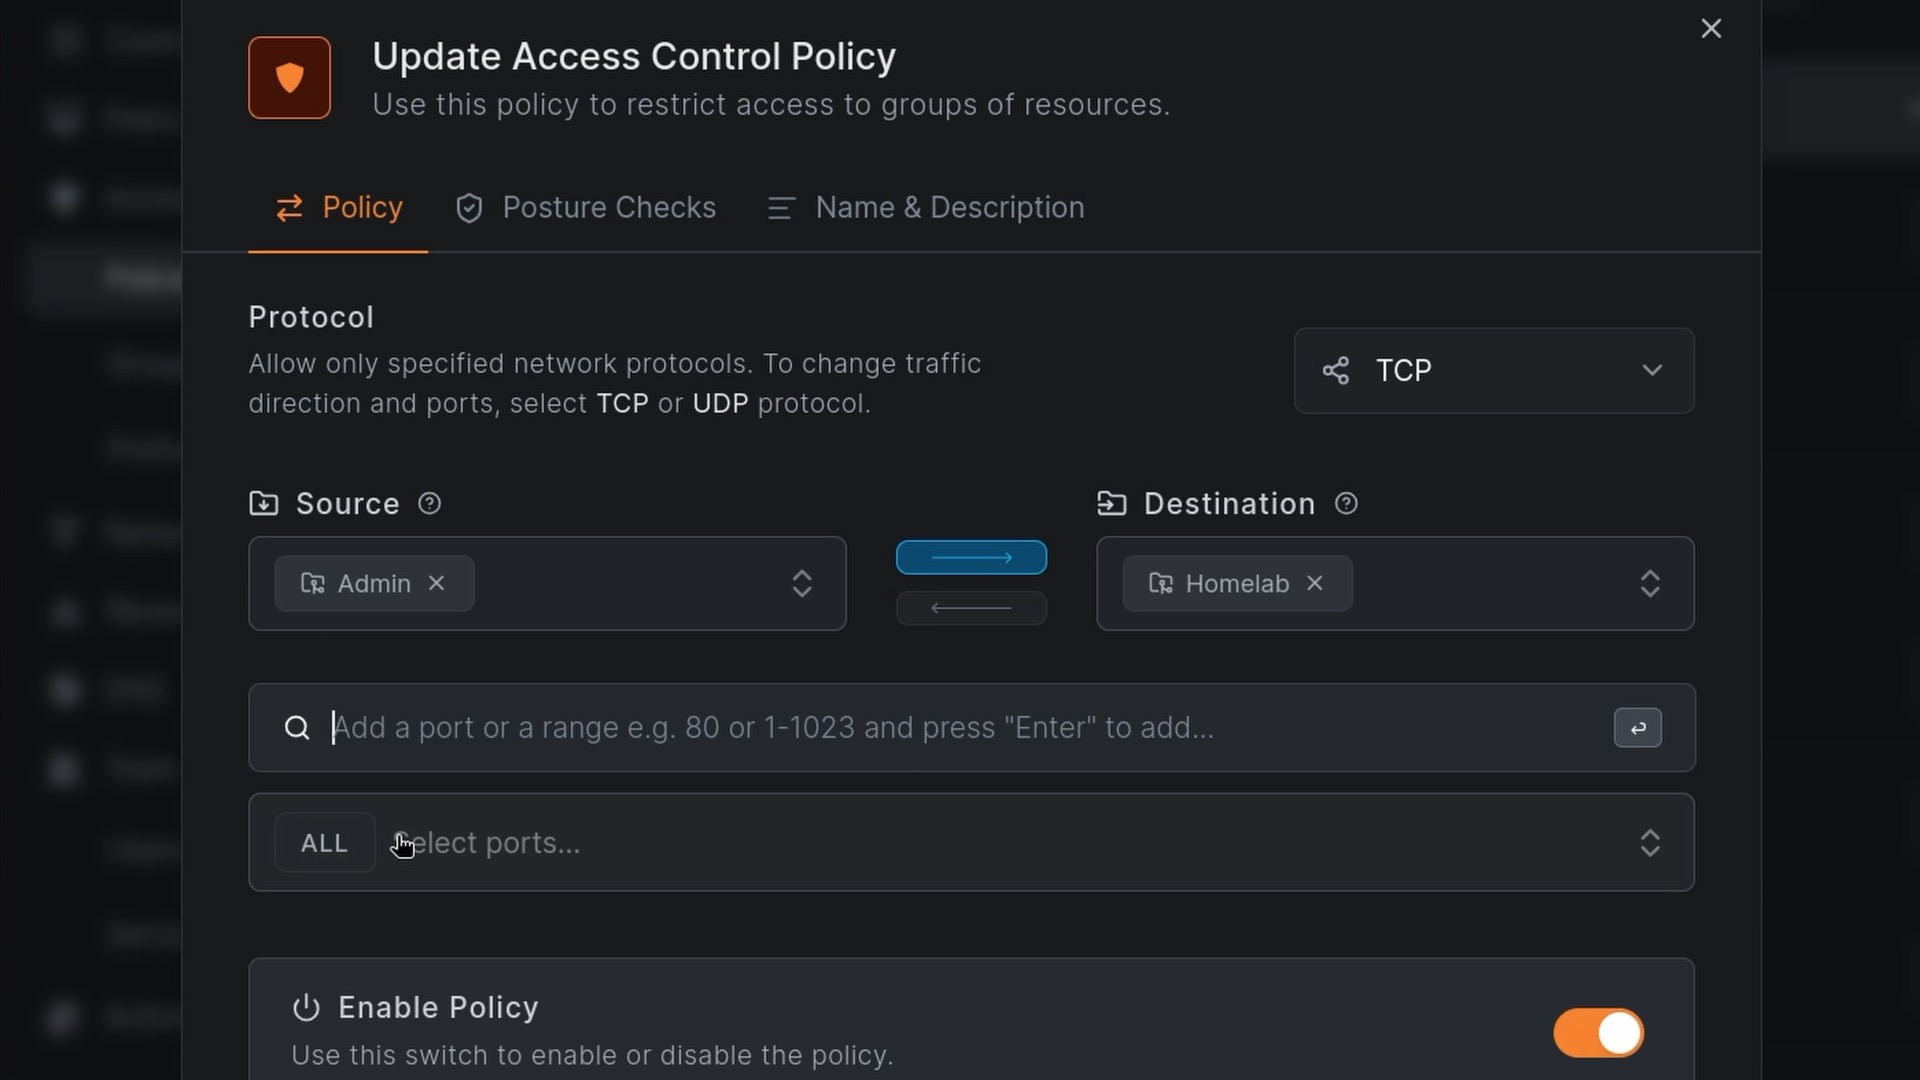
The base way to establish connectivity is an access control policy, so your NetBird user can reach the devices in the policy. My Linkwarden server sits in a device group, my user is in a few groups of its own, and a policy connects the two. If you're new, the flow is: give the peer a group on the Peers page, check your own groups under Team, then head to Access Control Policies and create a policy from your user group to the device group. The access control docs cover this well.
One thing worth calling out: my home policy uses protocol "All" because I want full admin access to my own machines. But if you wanted to give, say, a family member or a team member access to this service only, you'd switch the protocol to TCP and add port . Then Linkwarden is the only thing they can reach on that box. Pretty nice for sharing without oversharing.
With the policy in place, grab that NetBird IP from earlier and open from any of your other NetBird-connected devices. Just like that, you're accessing Linkwarden through an encrypted WireGuard tunnel, and it works exactly the same whether you're on your couch or on hotel Wi-Fi.
Friendly HTTPS with NetBird Reverse Proxy
Typing IPs and ports works, but you'll notice the browser calling it "not secure" since it's plain HTTP inside the tunnel. Another thing we recently released is the NetBird Reverse Proxy , which gets you a proper domain name with a real certificate. There are a couple different ways to go about it, so let's walk through them.
Do note that Reverse Proxy is currently a beta feature. NetBird-Only Access (which we'll get to in a minute) requires a proxy cluster with the Private capability, so you'll want a Bring Your Own Proxy cluster, and self-hosted users should follow the migration guide .
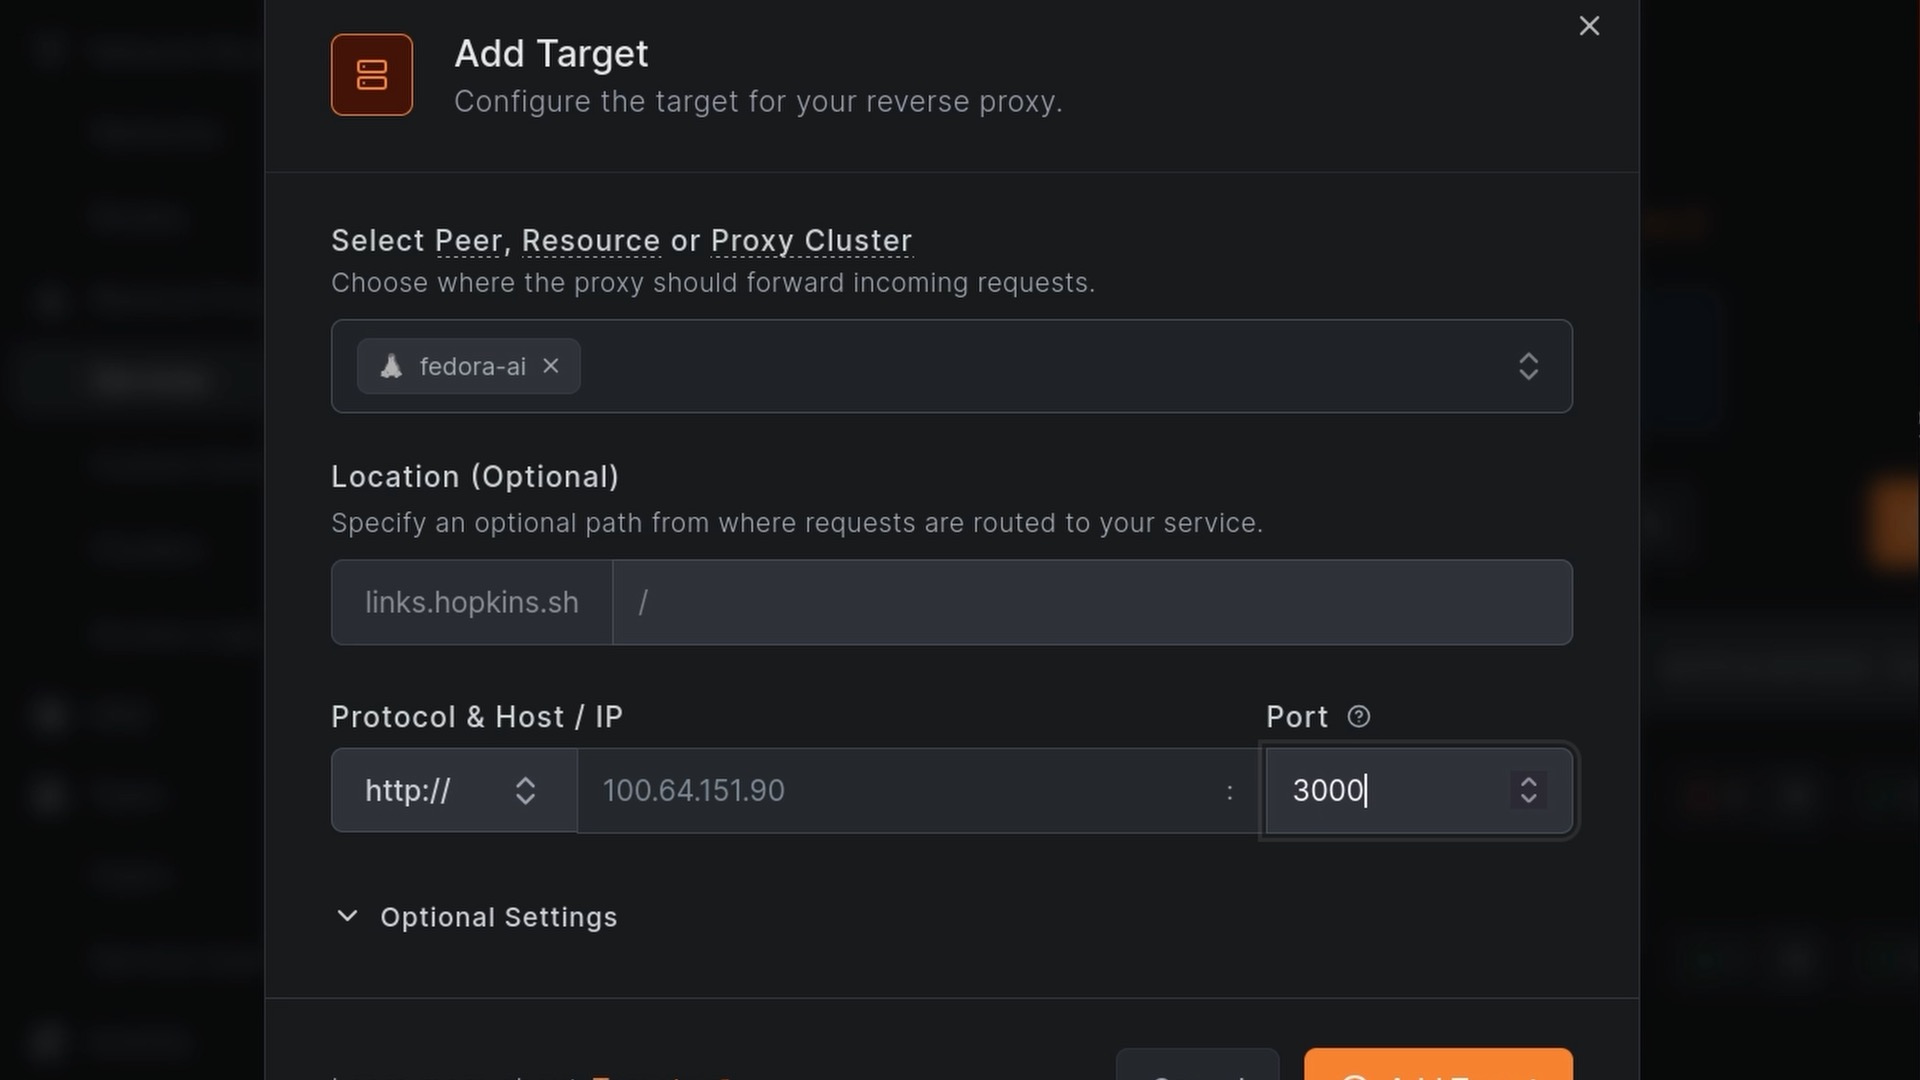
In the dashboard, head to Reverse Proxy, then Services, and add a new service. I'm calling mine , but name it whatever you want. For the target you have options:
- A peer directly. In my case, the server Linkwarden runs on. This is what we want here.
- A resource. These are network routes, so you can install NetBird on one device and reach services on other machines in that network, as entire subnets or individual IPs, with their own policies and access control.
Pick the peer, set the port to , and add the target.
Next up is authentication, and this is the part to pay attention to. Without any authentication, you're creating a proxy that basically anybody on the internet can reach. Sometimes that's what you want, but for a personal bookmark library, probably not. You've got a few layers to choose from:
- A PIN code. Anyone hitting the URL has to enter the PIN before they get through. Do note that for apps with their own built-in login, stacking extra authentication on top can sometimes make mobile apps or extensions act up, so keep that in mind.
- CrowdSec. A toggle for added protection against malicious IPs if you're leaving the service reachable.
- NetBird-Only Access. The good stuff, coming up next.
For the first round I added a PIN and created the service. You can watch the certificate get issued right there, and once it's done, clicking the link prompts for the PIN and drops you into Linkwarden over proper HTTPS. Technically you don't even need the NetBird client to access it this way, which is handy for sharing but not what I want long-term.
Going Private with NetBird-Only Access
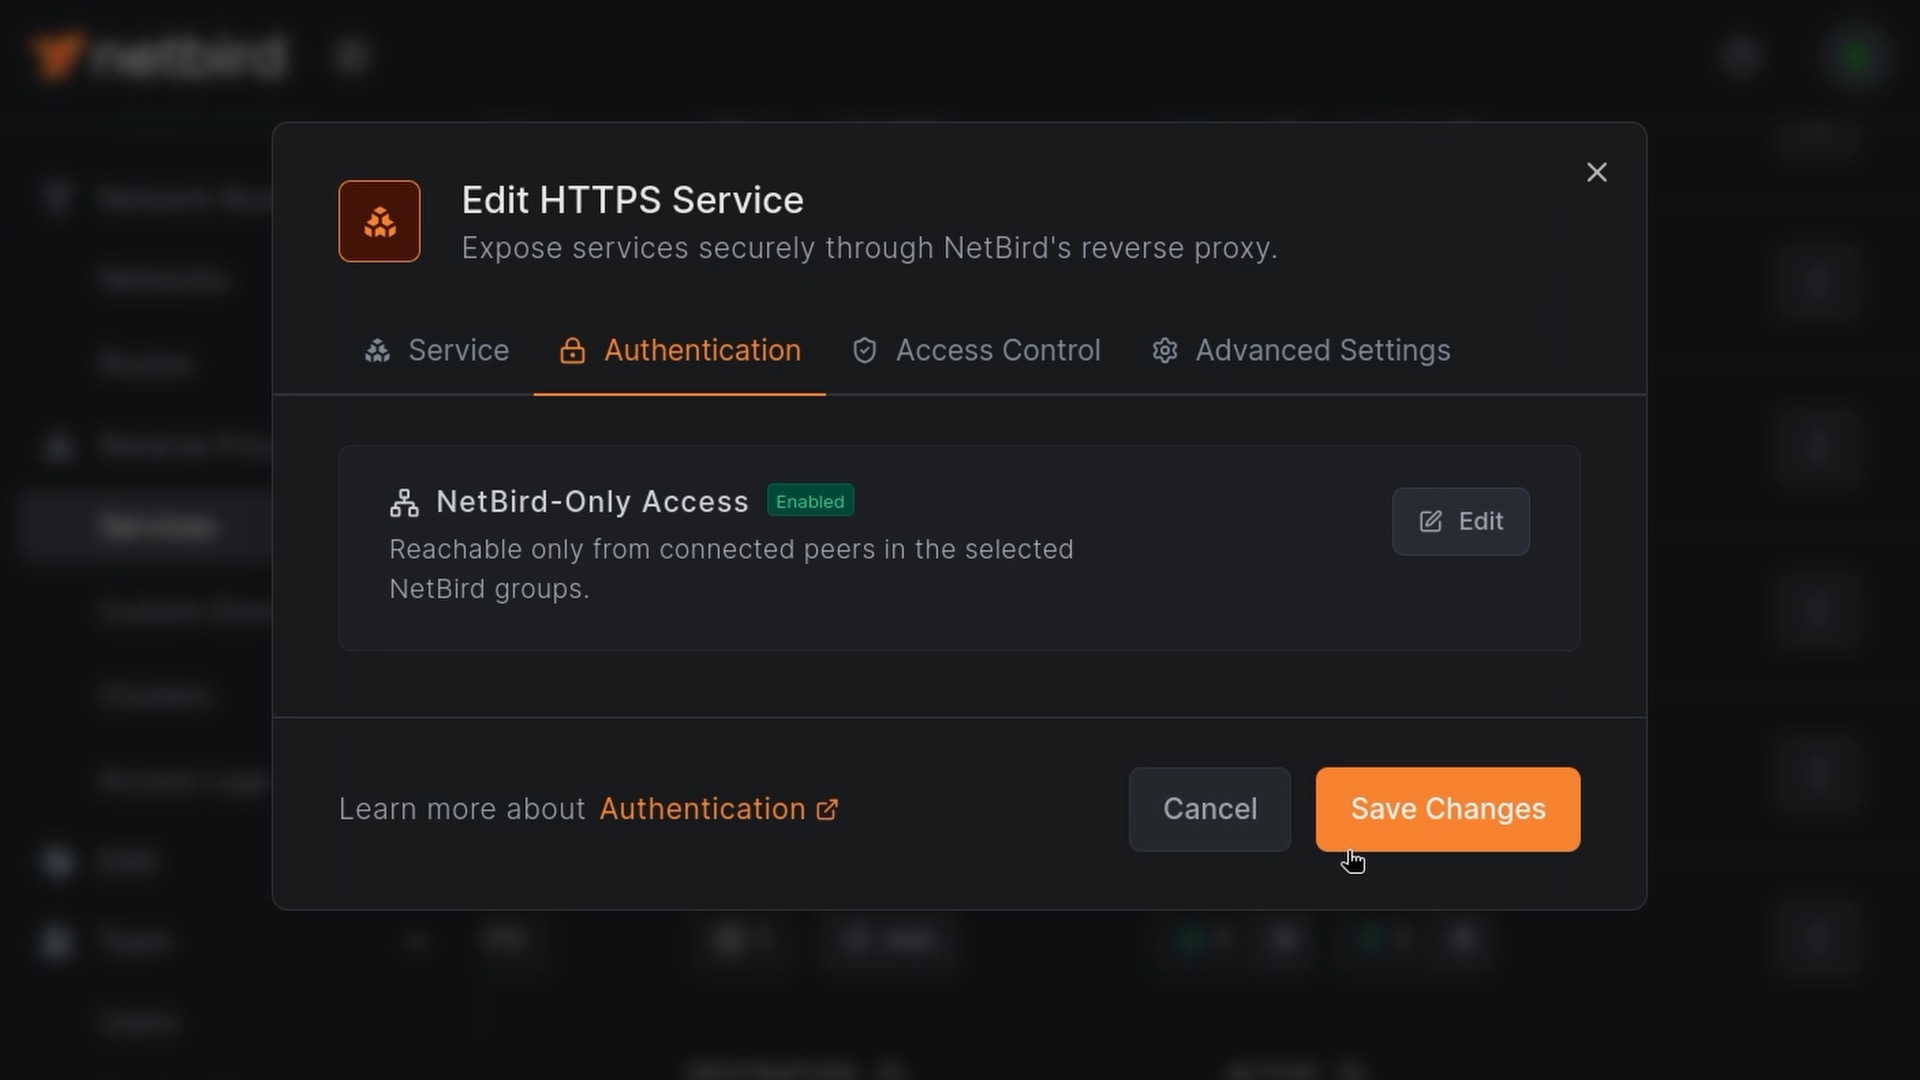
Let's go another step and test out the private services feature. NetBird-Only Access gives you that same pretty domain and certificate, but the only way to connect is if you're authenticated with the NetBird client. Pretty domains, and still nothing open to the public internet.
Edit the proxy service, and under authentication remove the PIN, it's not necessary anymore. Enable NetBird-Only Access and select the groups that should have access. In my case I went with my admins group. Save the changes.
Now for the fun part. Open with the NetBird client disconnected and you'll get a forbidden page. That is, until you open up the NetBird application, connect, and give it a refresh. Just like that, you're in, with the client authenticating you through the proxy. The service never touches the public internet, and you never opened a port. Pretty cool stuff.
If the proxy hostname is going to be your main way into Linkwarden, there's one backend tweak their reverse proxy docs recommend: point at the new domain so logins and redirects behave. Back in your :
Then one more time to apply it. only matters if you've set up SMTP for things like password resets, but it costs nothing to set it while you're in there.
This is also the address to give the mobile apps and browser extension. Since NetBird-Only Access is enforced at the network level rather than with a login page in front of the app, Linkwarden's own authentication flows work exactly like normal. Your phone just needs the NetBird client connected and the apps are none the wiser.
Wrapping Up
So that's Linkwarden, self-hosted with Docker in a couple of minutes, plus three ways to reach it remotely with NetBird: straight over the peer IP with access policies, through the reverse proxy with a PIN, and fully private with NetBird-Only Access. If you want to establish remote connectivity to anything else you're running, we have videos, documentation, and Knowledge Hub articles covering all kinds of setups.
And do note that the use cases for NetBird go well beyond standard remote access. You can cluster machines together, there's a Kubernetes operator , MDM integrations, and a whole bunch of enterprise features if that's something you're into.
Need help? Refer to these official guides:
I do hope you have an absolutely beautiful day. Goodbye!