
Self-Hosting NetBird with Authentik
NetBird is an open-source zero trust networking platform that lets you build secure private networks using the WireGuard protocol. The self-hosting experience has improved significantly — a single script handles the full setup, including Traefik as a reverse proxy with automatic TLS and a built-in local user system right out of the box.
For production deployments, pairing NetBird with an external identity provider gives you SSO, multi-factor authentication, and centralized user management. In this guide we'll use Authentik a powerful open-source identity provider, as our IdP. We'll also run a NetBird client alongside Authentik in the same Docker network and use NetBird's built-in reverse proxy to expose it securely — no separate proxy stack required.
Heads up: Don't put CrowdSec or geo-restrictions in front of your IdP domain when exposing it through the internal network — it'll block NetBird's own auth callbacks and lock you out. More on this below.
Prerequisites
A Linux VPS with at least 2 CPU cores and 4 GB of RAM works well here (Authentik needs a minimum of 2 cores and 2 GB on its own). The server needs to be publicly accessible on TCP ports 80 and 443 and UDP port 3478.
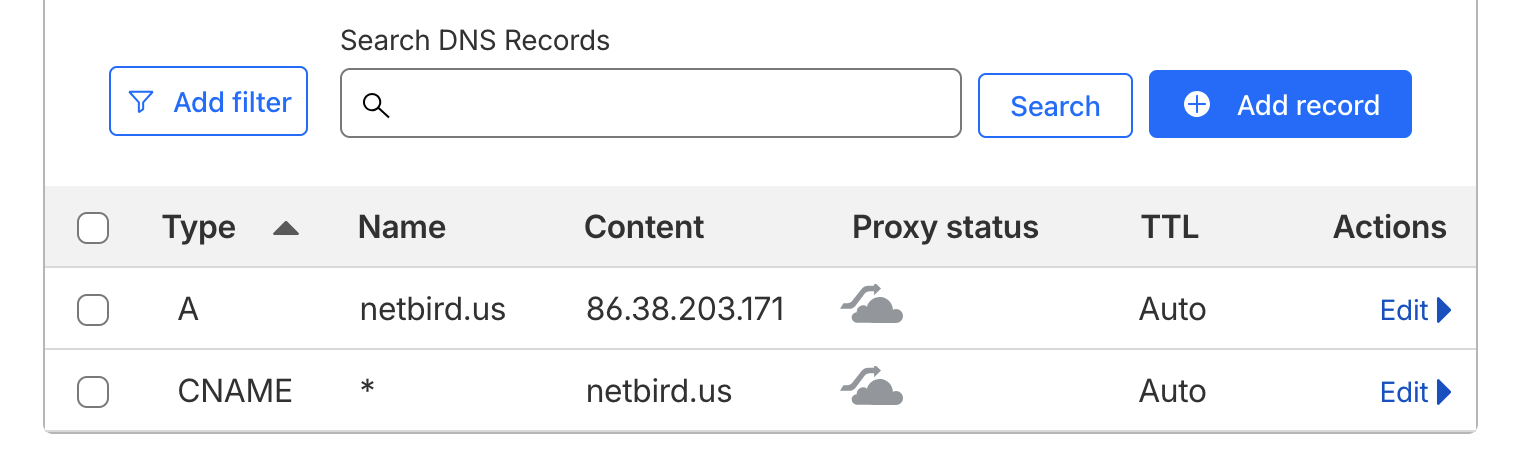
You'll need a public domain with two DNS records pointing to your VPS. If you're using Cloudflare, make sure both records are set to DNS only — not proxied.
| Type | Name | Content | Proxy Status |
|---|---|---|---|
| A | DNS only | ||
| CNAME | DNS only |
The A record is for the NetBird management dashboard. The wildcard CNAME ensures all service subdomains (e.g., ) resolve to your server, which is what the built-in reverse proxy uses to expose Authentik.
Make sure Docker is installed on your VPS along with and . The Docker convenience script is the easiest way to get everything set up:
NetBird Setup
Create a directory and run the install script:
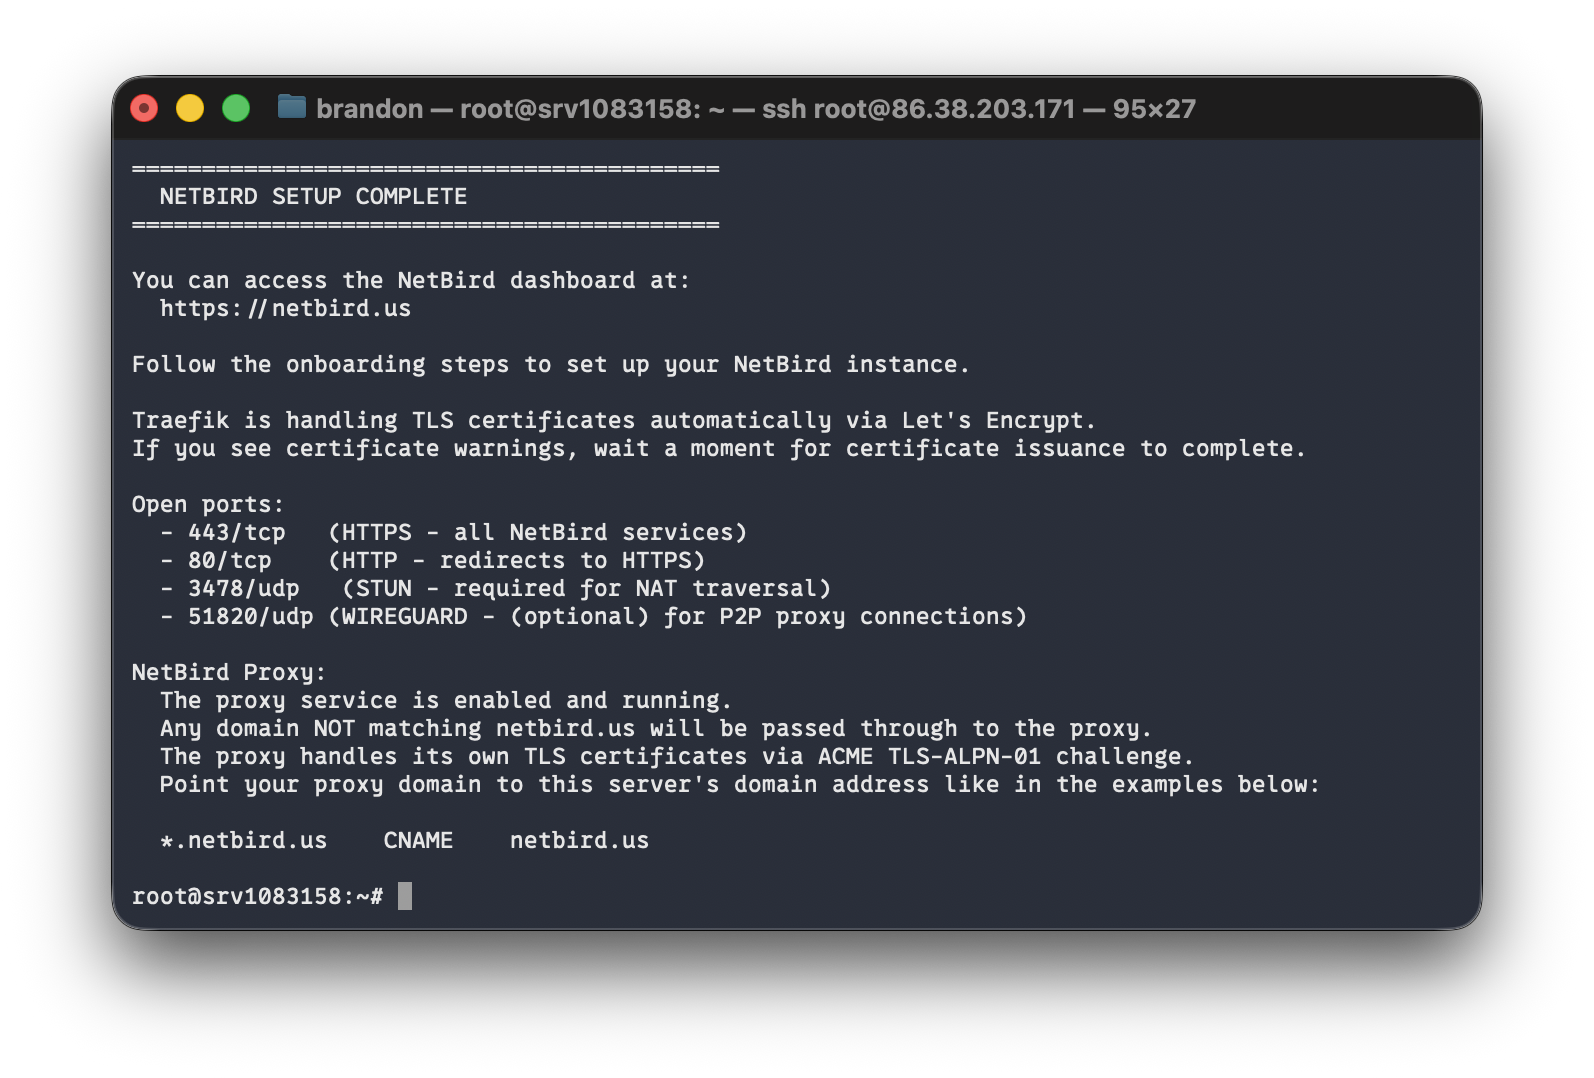
The script will walk you through a few prompts. Enter your domain (e.g., ) and select the reverse proxy option:
Press Enter to go with Traefik. It handles TLS via Let's Encrypt automatically. When prompted to enable the NetBird Proxy service, type :
This is the built-in reverse proxy feature we'll use later to expose Authentik without needing Nginx, Caddy, or a separate proxy stack.
Initial Login
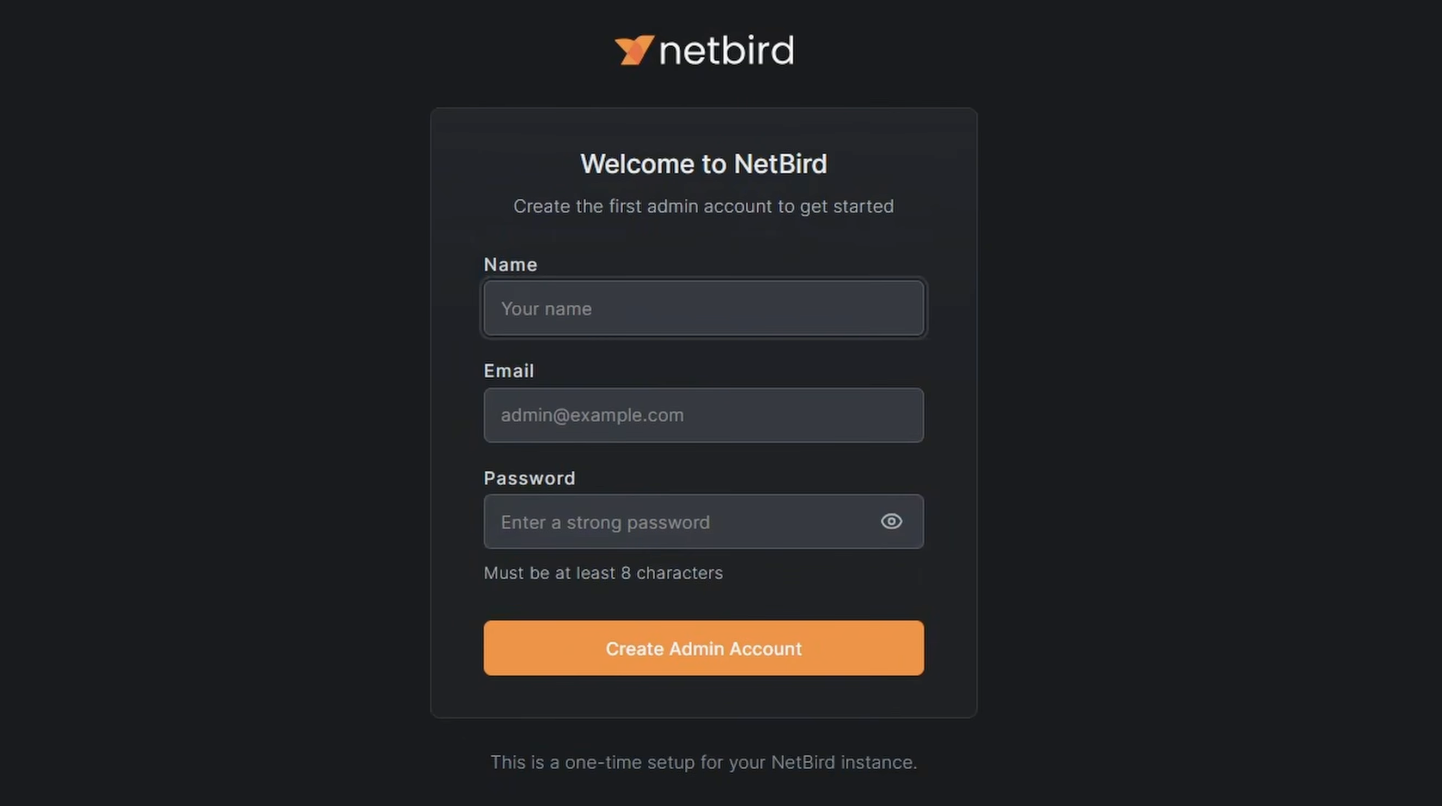
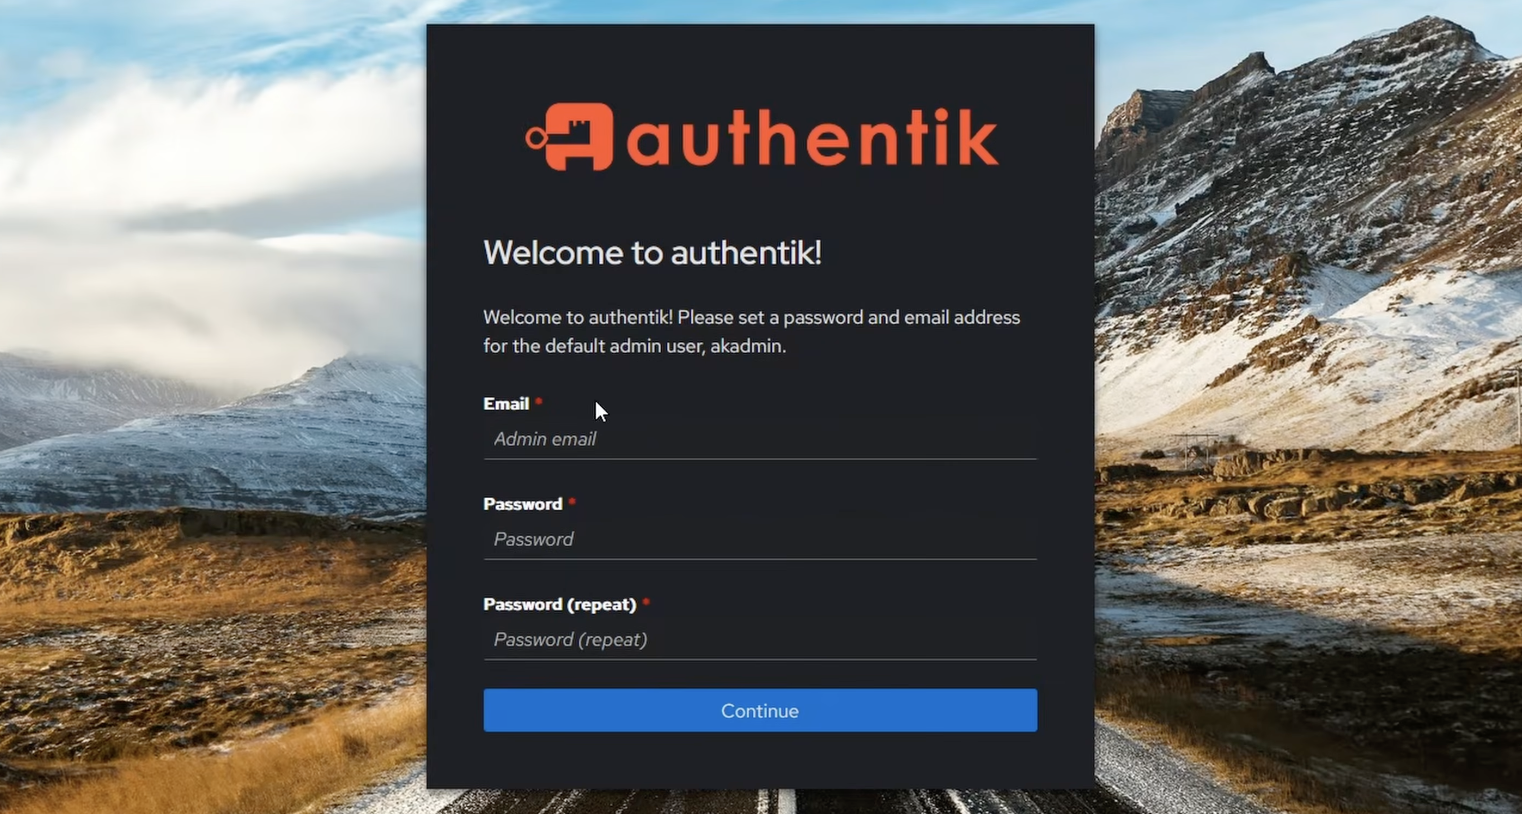
Navigate to your NetBird dashboard at . You'll land on a setup page — create your local admin account here. This account uses NetBird's embedded IdP and is temporary. We'll replace it with Authentik later.
Authentik
Authentik is a full-featured identity management platform. Beyond just being an IdP for NetBird, it supports a wide range of integrations — anything that speaks OAuth2, OIDC, or SAML will work with it. We're going to run it in the same Docker stack as a NetBird client container. That client acts as a routing peer, which means NetBird can reach anything on that Docker network. The reverse proxy then uses that routing peer to expose Authentik under your domain with automatic TLS.
Install Authentik
Create a directory for the Authentik stack:
Download the official Docker Compose file:
Generate Credentials
Authentik requires a PostgreSQL password and a secret key. Generate both and write them to a file:
Add the NetBird Sidecar
We'll add a shared Docker network with static IPs to the downloaded compose file, then append a NetBird client container to the stack. The static IPs are important — the reverse proxy needs to know exactly where to find the Authentik server container.
First, generate a setup key in the NetBird dashboard. Go to Setup Keys > Add Setup Key, give it a name like "VPS Services", and copy the key.
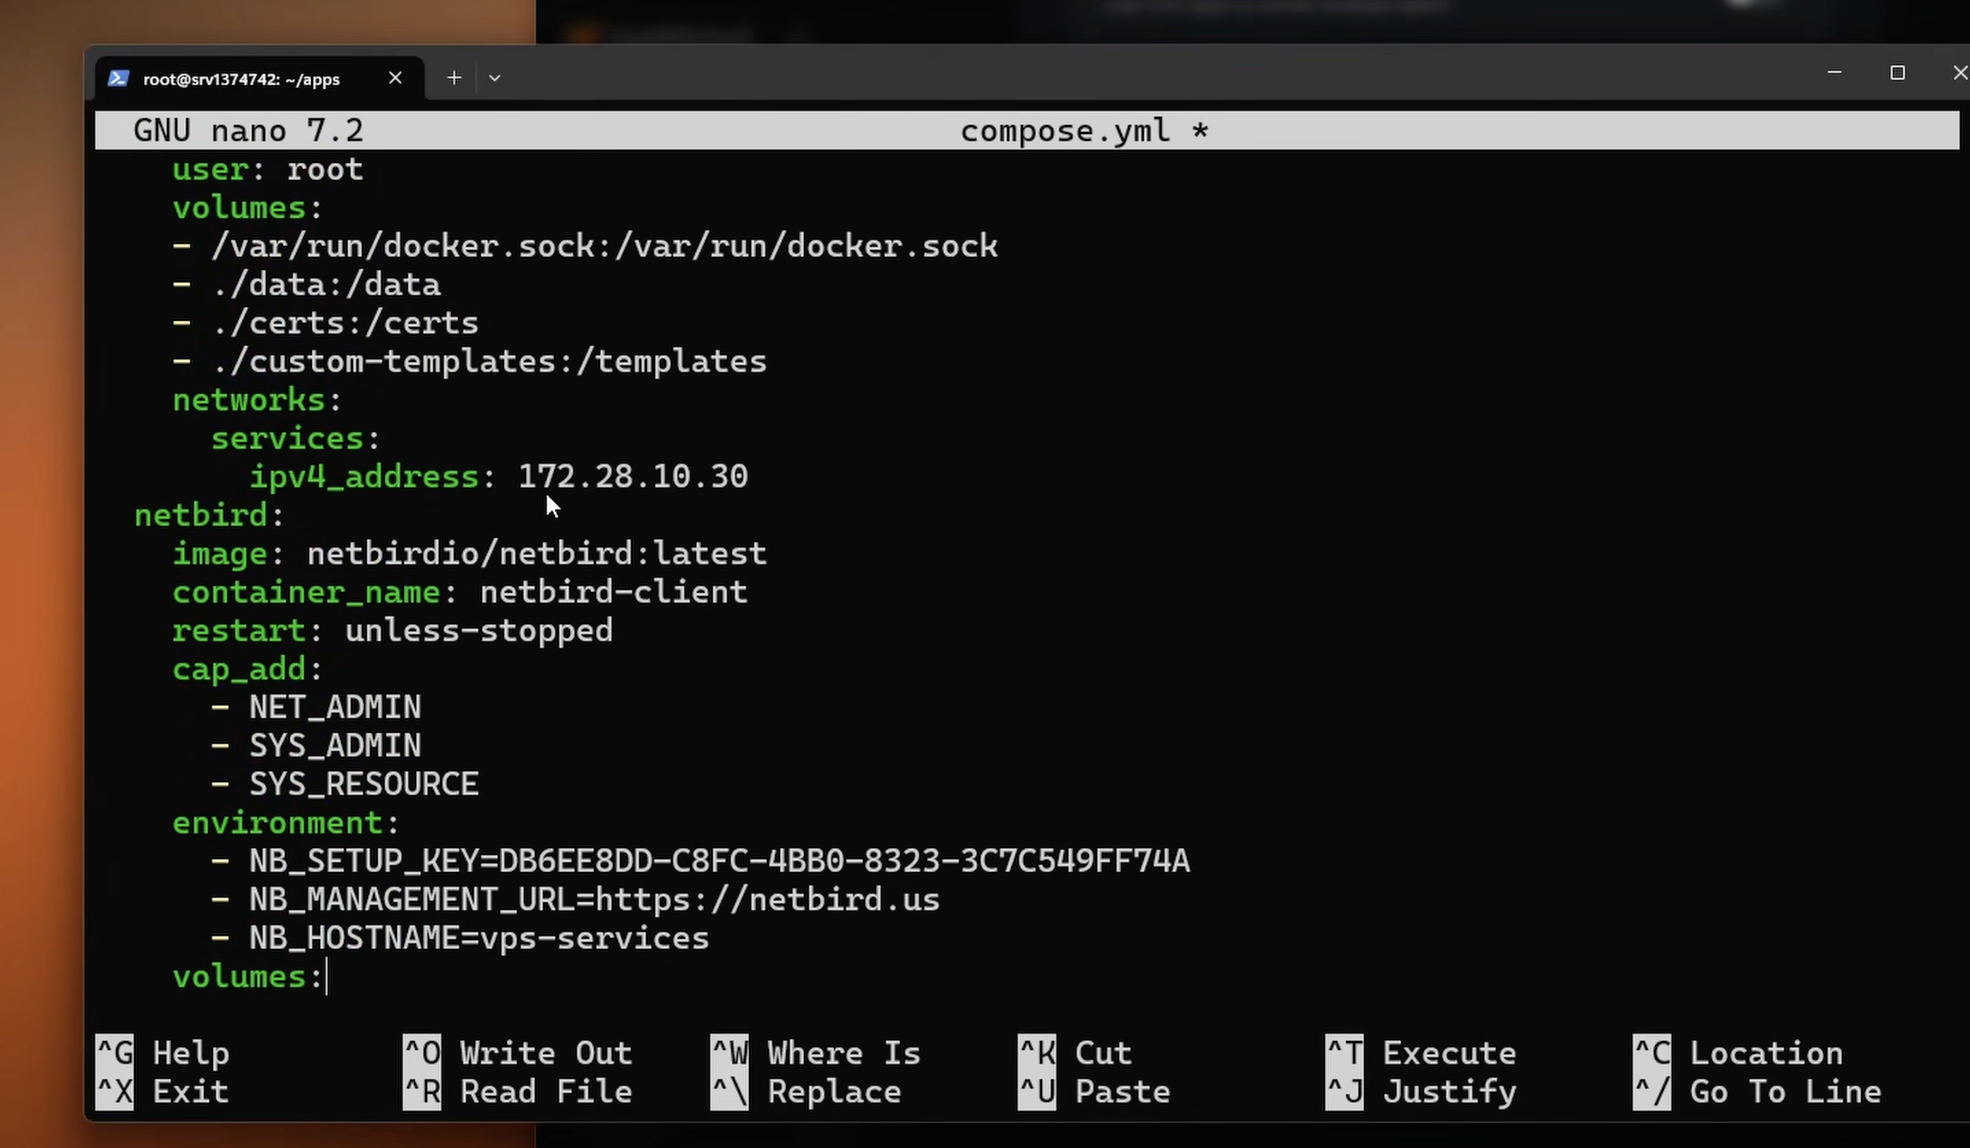
Open and add a stanza to each of the three existing services:
postgresql — add inside the service block:
server — add inside the service block:
worker — add inside the service block:
Then append the NetBird service to the block and add the top-level definition at the end of the file:
Replace with the key you just copied, and update to match your NetBird domain. The Authentik server sits at on port 9000 — that's what we'll point the reverse proxy at.
Start the stack:
Give it a minute to pull images and initialize. Once it's up, you should see the vps-services peer appear in your NetBird dashboard under Peers.
Initial Authentik Setup
Navigate to to create your Authentik admin account. This is a one-time setup and the page won't be accessible after the admin password is set.
Note: Once Authentik is exposed through the NetBird reverse proxy, you can close port 9000 on your firewall. Until then, keep it open so you can complete the initial setup.
Set Up the Network and Routing Peer
Now tell NetBird that the peer can route traffic to the Authentik Docker subnet:
- In the NetBird dashboard, go to Networks > Add Network
- Name it something like "VPS Services"
- Add a network resource with the subnet
- Assign vps-services as the routing peer
- Create a policy to control which peers can access this network (e.g., restrict to an admin group)
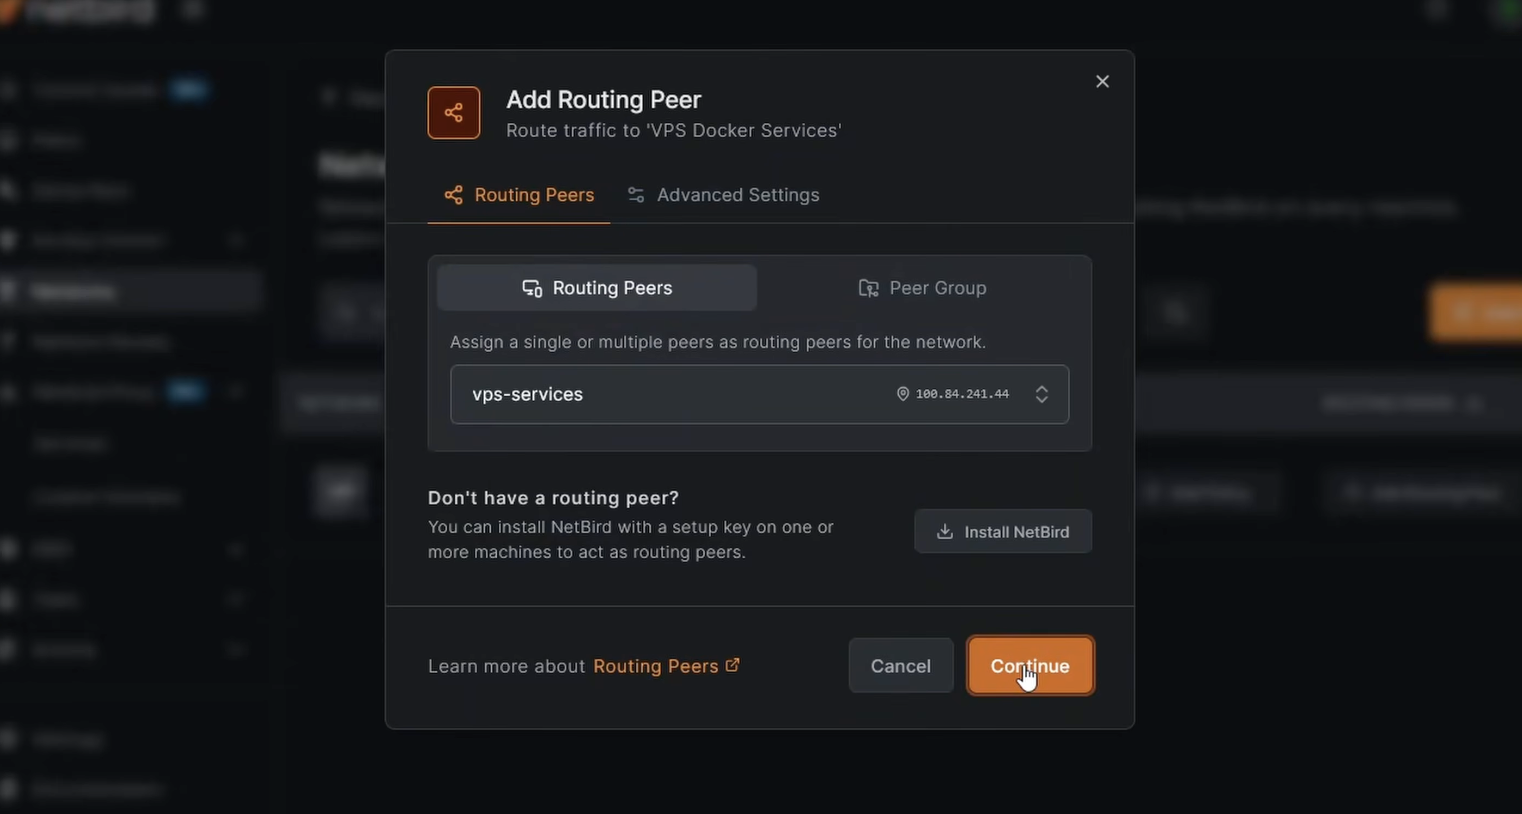
With that saved, any container on is reachable through the NetBird network via the routing peer. If you add more services to this stack later, assign them an IP in this range and the same NetBird client routes traffic to all of them.
Expose Authentik with the NetBird Reverse Proxy
Instead of opening Authentik to the public internet directly, we'll use NetBird's built-in reverse proxy to expose it under your domain with automatic TLS.
- In the NetBird dashboard, go to Reverse Proxy > Services > Add Service
- Enter a subdomain like and select your domain — the full URL will be
- Click Add Target, select the VPS Services network resource, enter the Authentik server IP , set protocol to HTTP and port to 9000
- Under the Authentication tab, leave all methods disabled — Authentik handles its own auth
- Enable Pass Host Header and click Add Service
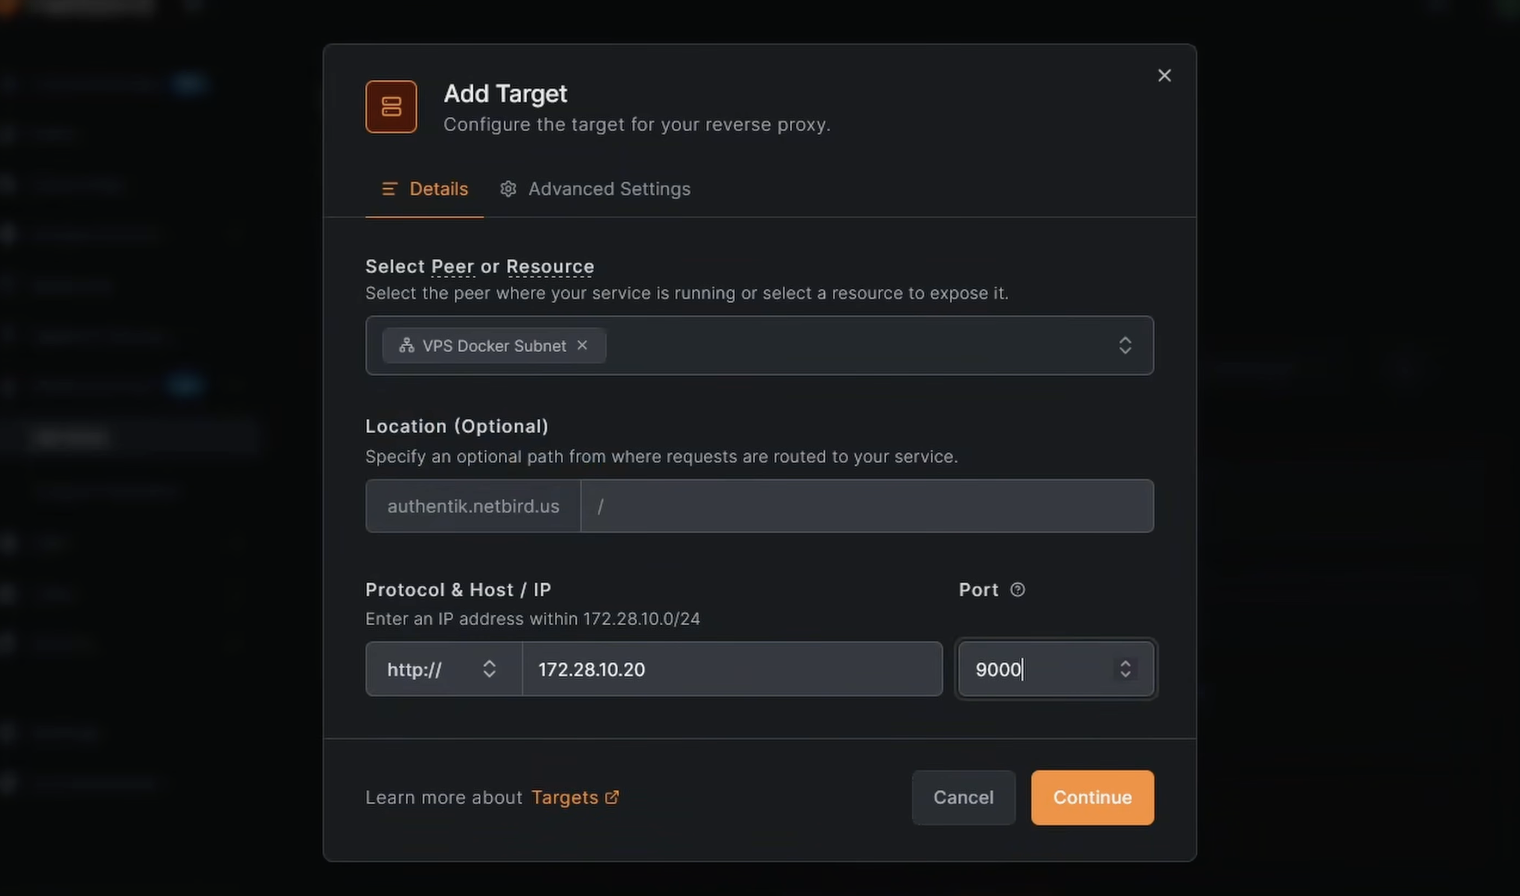
NetBird provisions a TLS certificate and establishes the tunnel. Once the service shows as active, navigate to — Authentik should load over HTTPS through your NetBird network. At this point you can close port 9000 on your server's firewall.
Warning: If you're running CrowdSec IP reputation on the reverse proxy, do not apply it (or geo-restrictions) to your Authentik / IdP service when it's exposed via an internal network like this. The management server's auth callbacks come from inside the NetBird network, and a country/IP block will reject those internal calls and break login. If you've already done this and are locked out, see Issue 3: Geo-restrictions block internal traffic from the management server for the fix.
Configure Authentik as the NetBird IDP
With Authentik accessible, we can configure it as the identity provider for NetBird. This involves creating an OAuth2 provider and application in Authentik, then wiring it up in NetBird settings.
Create an OAuth2/OIDC Provider in Authentik
- Log into Authentik at and go to the Admin Interface
- Navigate to Applications > Providers > Create
- Select OAuth2/OpenID Provider and click Next
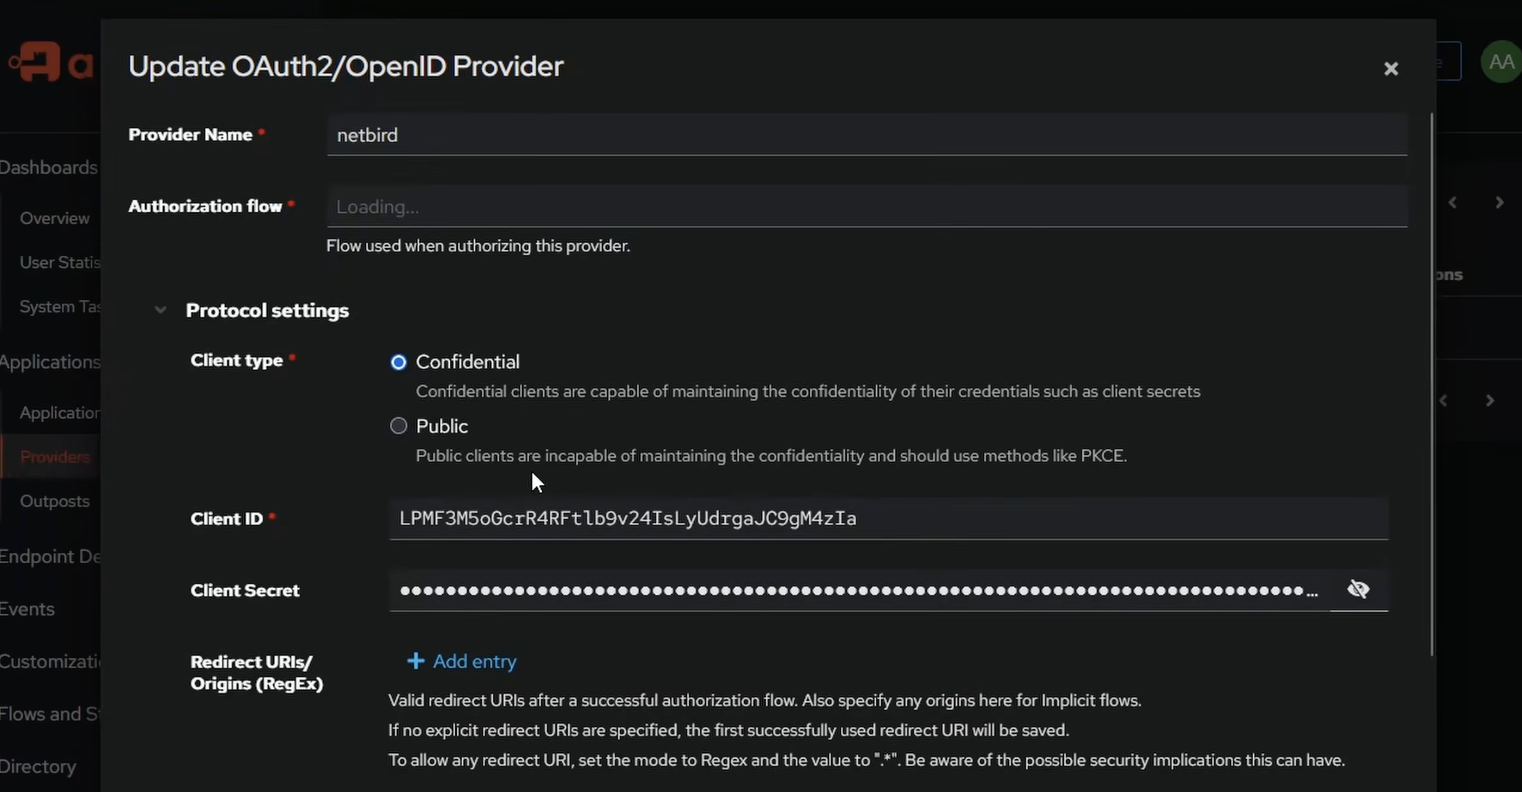
- Set the Name to
- For Authorization flow, select
- Set Client type to Confidential
- Leave the Signing Key as the Authentik self-signed certificate
- Click Finish
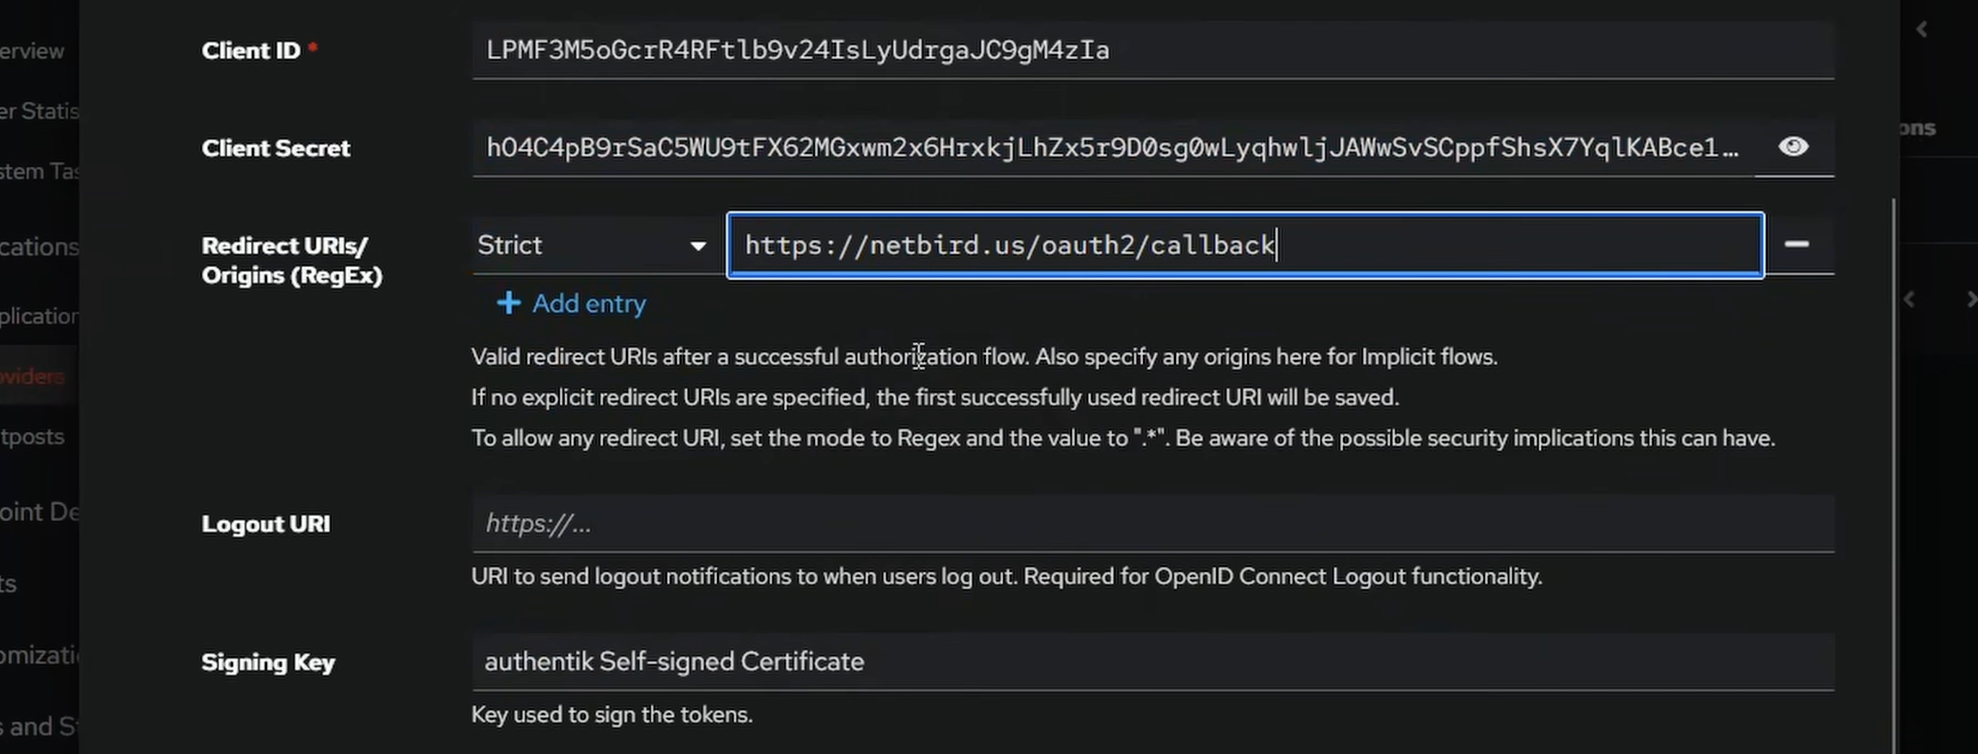
Once created, open the provider and note the Client ID and Client Secret — you'll need these shortly.
Create an Application in Authentik
- Go to Applications > Applications > Create
- Set the Name to and the Slug to
- Select the provider you just created
- Click Create
Add Authentik as an Identity Provider in NetBird
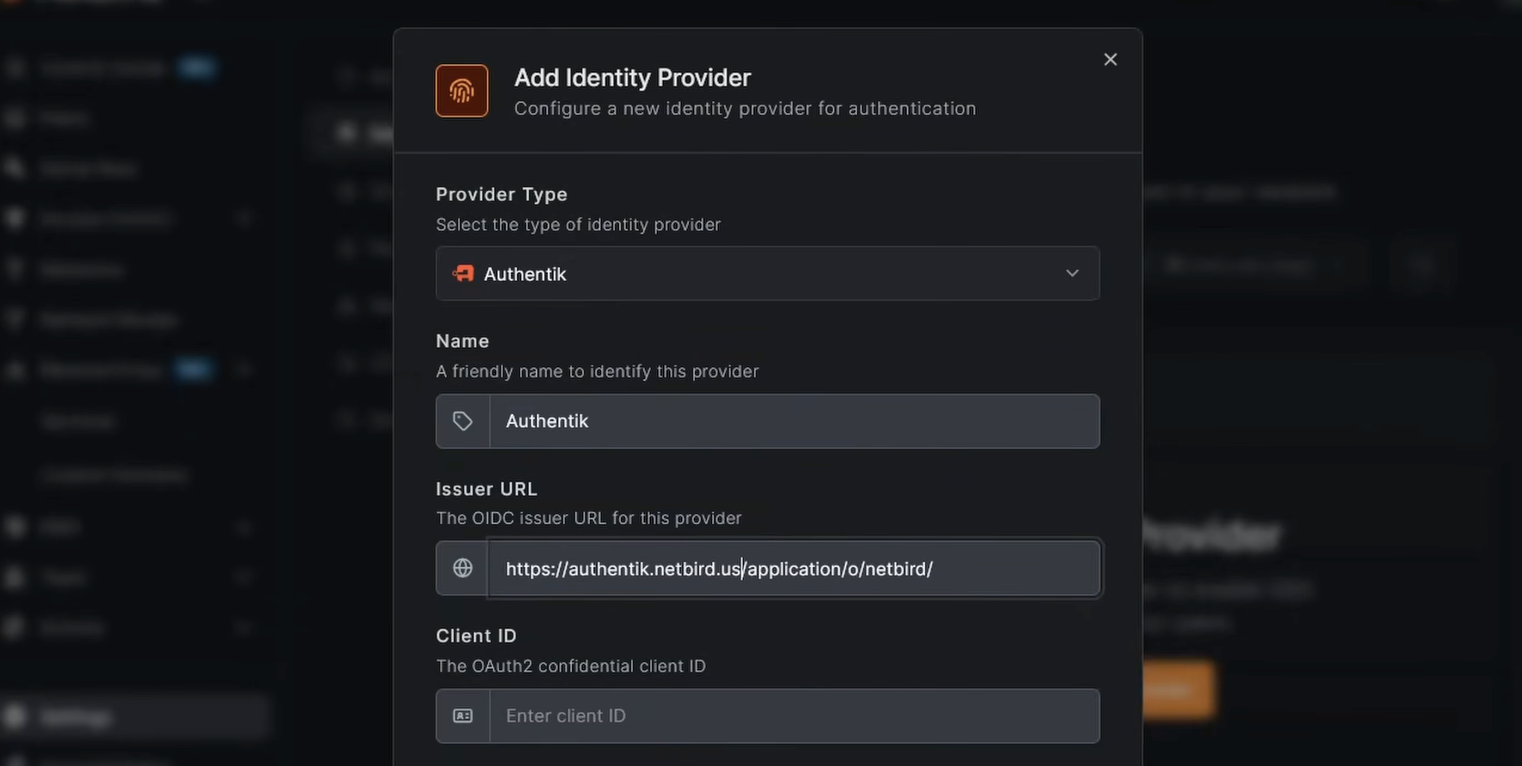
- In the NetBird dashboard, go to Settings > Identity Providers > Add Identity Provider
- Select Authentik
- Fill in the fields:
- Issuer URL:
- Client ID: paste from Authentik
- Client Secret: paste from Authentik
- Click Add Provider
- Copy the Redirect URL that NetBird displays
Add the Redirect URI in Authentik
- Back in Authentik, go to Applications > Providers and edit the NetBird provider
- Under Redirect URIs, click Add, set the mode to Strict, and paste in the redirect URL from NetBird
- Click Update
Authentik is now configured as the NetBird identity provider.
User Management
Test the Login Flow
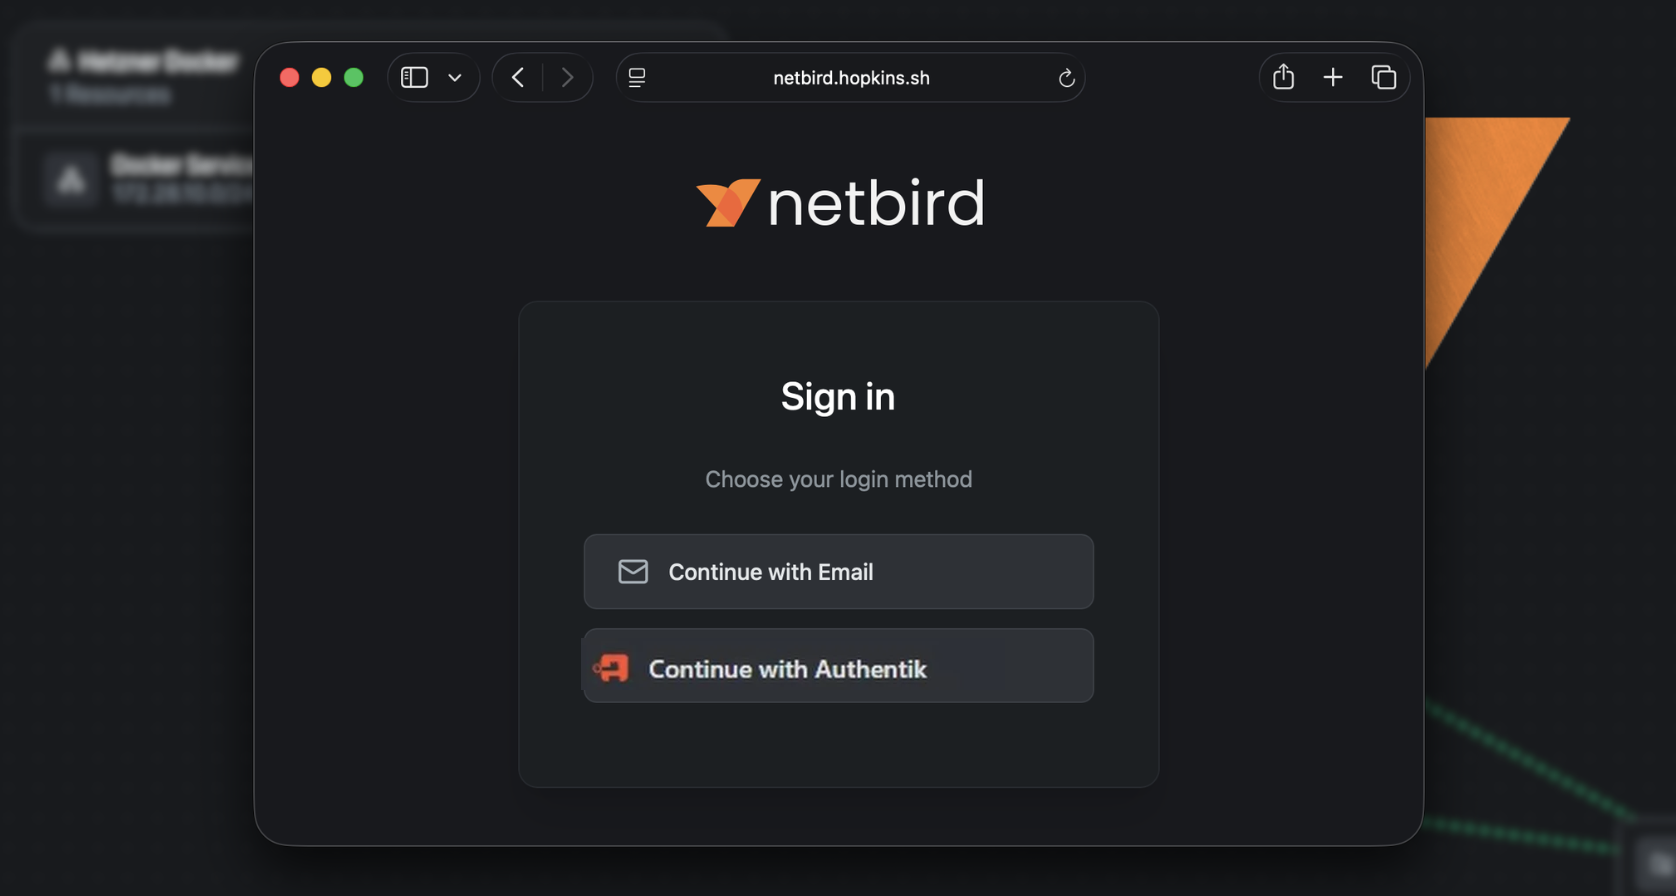
Open a new browser window or incognito tab and navigate to your NetBird dashboard. You should see an Authentik option on the login page. Click it — you'll be redirected to Authentik to authenticate.
After logging in, NetBird will show a User approval pending message for the new Authentik-managed user. Head back to the NetBird dashboard, go to Team > Users, and approve the pending user.
Transfer Ownership and Remove the Local Account
Once the Authentik user is approved and working:
- In Team > Users, find the Authentik-managed user and change their role to Owner
- Log out of the local account and log back in using Authentik to confirm everything works
- Delete the original local user account — you no longer need it
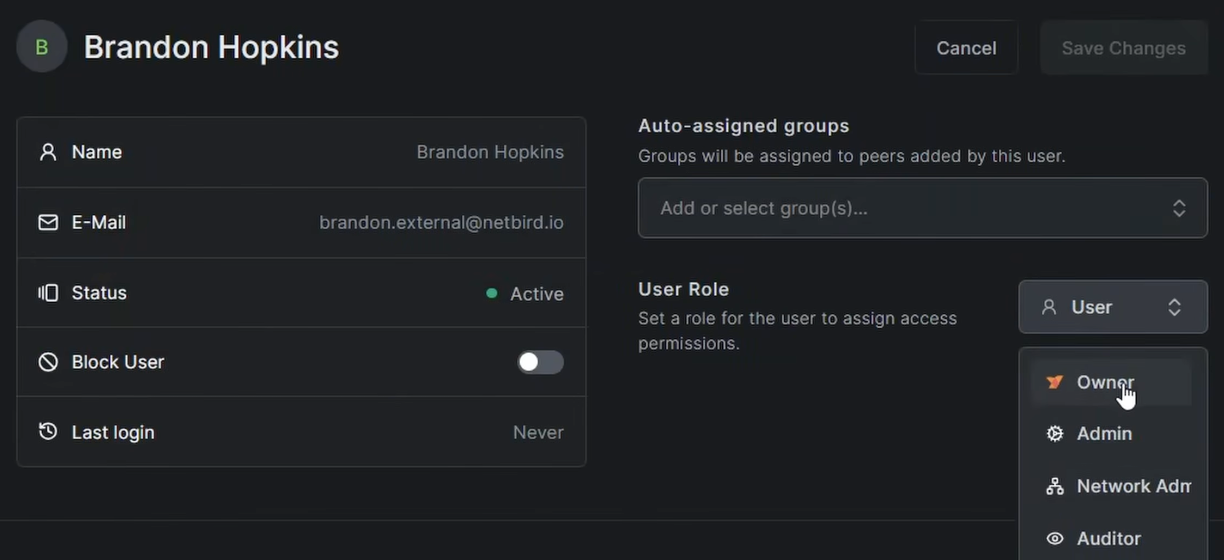
Warning: Confirm you can successfully log in via Authentik before removing the local account. Losing access to both accounts at once would lock you out of the dashboard.
Managing Users
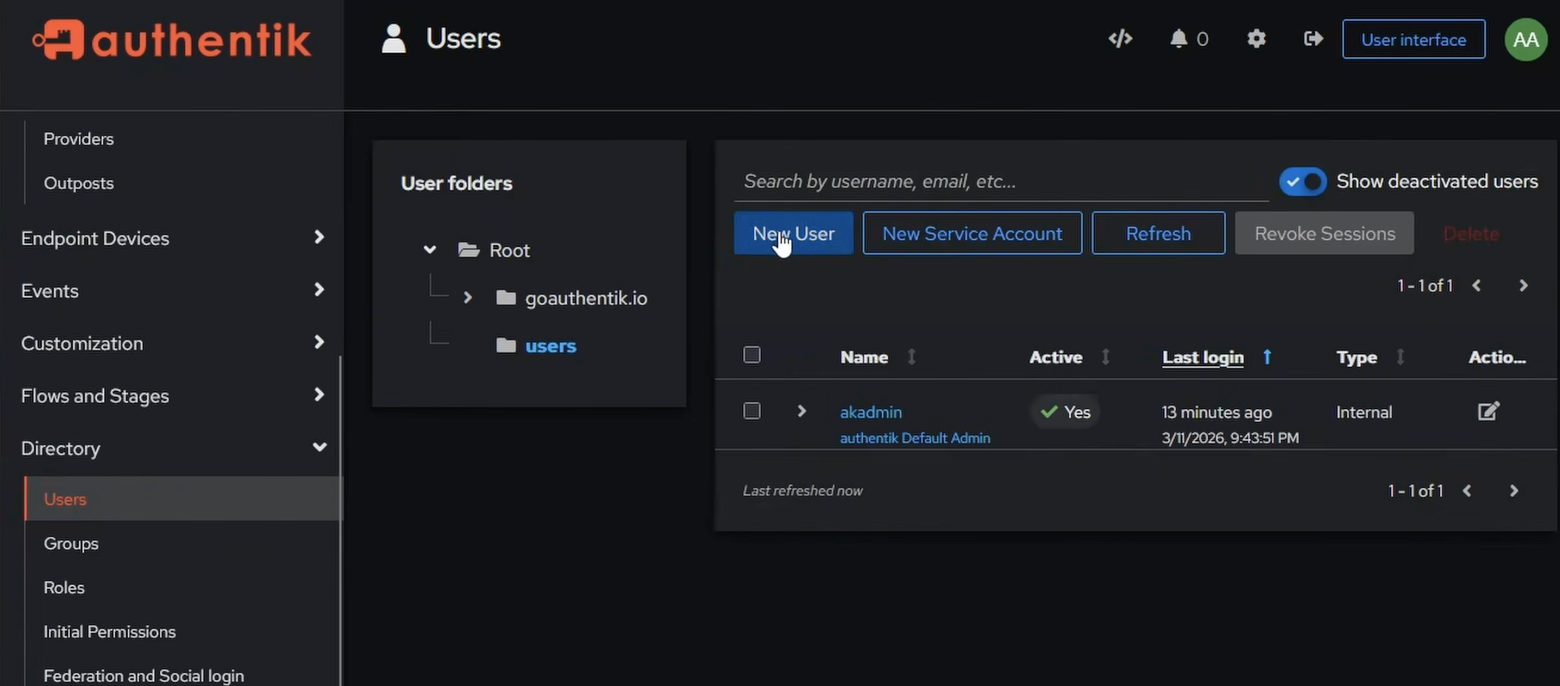
To add users in Authentik, go to Directory > Users > Create. You can also create groups under Directory > Groups and use them for access control. If you want NetBird to automatically sync Authentik group memberships, see the JWT group sync documentation — Authentik includes a claim in the ID token by default through the scope.
Conclusion
You now have a fully self-hosted NetBird instance with Authentik handling authentication. Authentik gives you SSO, MFA, and a full user directory — and because it's running as a sidecar in the same Docker network, it's exposed securely through an encrypted WireGuard tunnel via the NetBird reverse proxy. No extra proxy stack, no open ports beyond what NetBird needs. Any additional services you add to the Docker network are immediately routable through the same NetBird client.